Easily Transfer Music from iPhone to USB Without Computer
Running out of storage on your iPhone? This guide shows how to transfer music from iPhone to USB drive without a computer. It includes additional tips for faster transfers on your computer using tools like FoneTool and iTunes.
Can You Transfer Music from iPhone to USB Stick Without Computer?
Copy music from iPhone to USB stick
I want to remove my music library from my iPhone as I have run out of memory. I bought a USB stick. I want to be able to plug the stick into iPhone and copy music to the USB without computer. Is it possible?
- Question from Apple Community
If you want to know how to transfer music or other files from iPhone to USB drive without computer, then you have come to the right place. Although it is simple to transfer music from iPhone to computer or USB flash drive, it is difficult to do it without a computer. Luckily, there's a way! This guide will walk you through the process step by step.

Transfer Music from iPhone to USB with Lightning to USB Adapter
If you prefer to transfer music from iPhone to flash drive without computer, then you can turn to external USB adapter. It helps directly connect your iPhone and the USB drive to make the transfer process run smoothly. This USB adapter can easily transfer music and other types of your iPhone.

- ★What you’ll need to get started:
- An iPhone running iOS 13 or later
- A Lightning to USB adapter (also known as the Camera Connection Kit)
- A USB stick with sufficient storage
Step 1. Connect the Lightning to USB adapter to your iPhone > Plug the USB stick into the adapter.
Step 2. Open the Files app on your iPhone > Tap the three-dot to select the song(s) or playlist(s) you want to transfer > Tap the Copy icon from the bottom of the screen to copy these files.

Step 3. Go back to the main File screen and tap on the USB stick under Locations.
Step 4. Tap Paste to transfer music from computer to USB stick. When it is completed, safely eject the USB stick from your iPhone.
That’s it! Your music is now safely transferred to the USB stick and ready for use.
Bonus: Transfer Music from iPhone to USB with Computer (Faster Way)
Although it is convenient to transfer music without a computer, you may find some disadvantages when transferring iPhone data to USB: You can't sort or organize the transferred files, and the process will drain your iPhone's battery quickly.
If you have a computer, here are two faster and more efficient ways to help you move music from iPhone to USB stick:
Option 1. Transfer Music from iPhone to USB Stick via FoneTool
FoneTool is a powerful and user-friendly iOS data transfer tool designed to simplify the process of moving music, photos, videos, and other files between iPhone, computers, and external storage devices such as USB sticks.
🔸 Efficient Transfer: Move a large music library from iPhone to USB in minutes without quality loss.
🔸 Selective Transfer: Pick specific songs, playlists, or albums to transfer, saving time and space.
🔸 No Data Erasure: Don't delete existing files on iPhone and USB, ensure data security and completeness.
🔸 Wide Compatibility: Works with all iPhones, iOS versions, and storage devices.
🔸 User-Friendly: Intuitive design with step-by-step guidance, easy-to-use for beginners to use.
Step 1. Download the FoneTool freeware, and connect your iPhone and USB stick to computer.
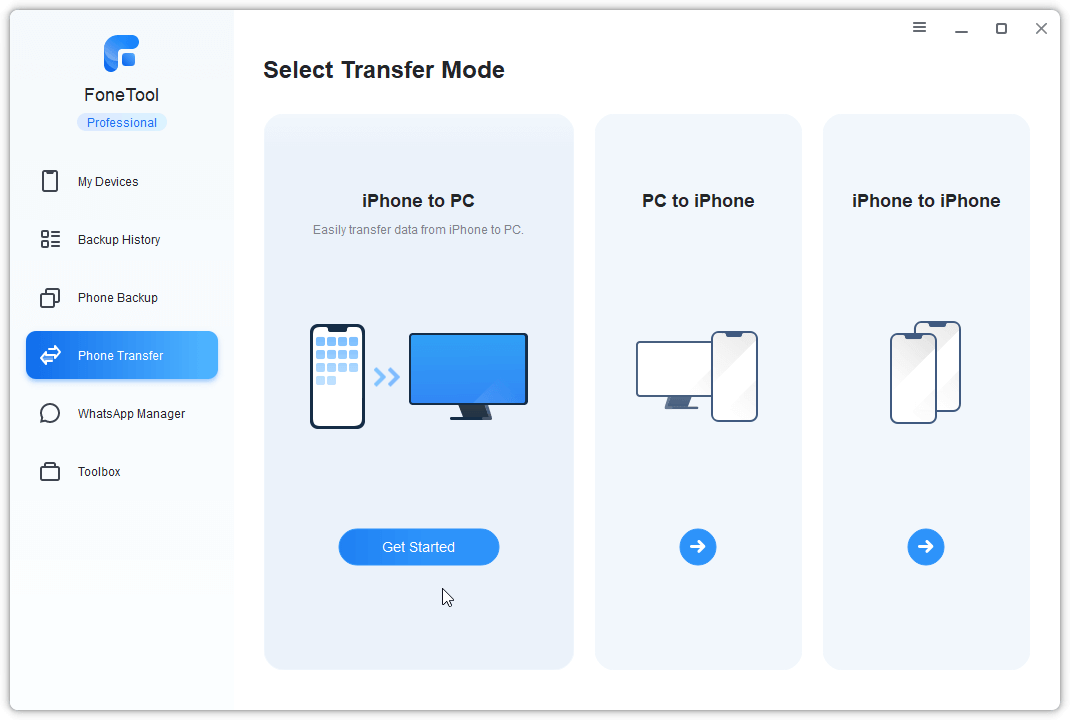
Step2. Run FoneTool and go to Phone Transfer > iPhone to PC and click Get Started.
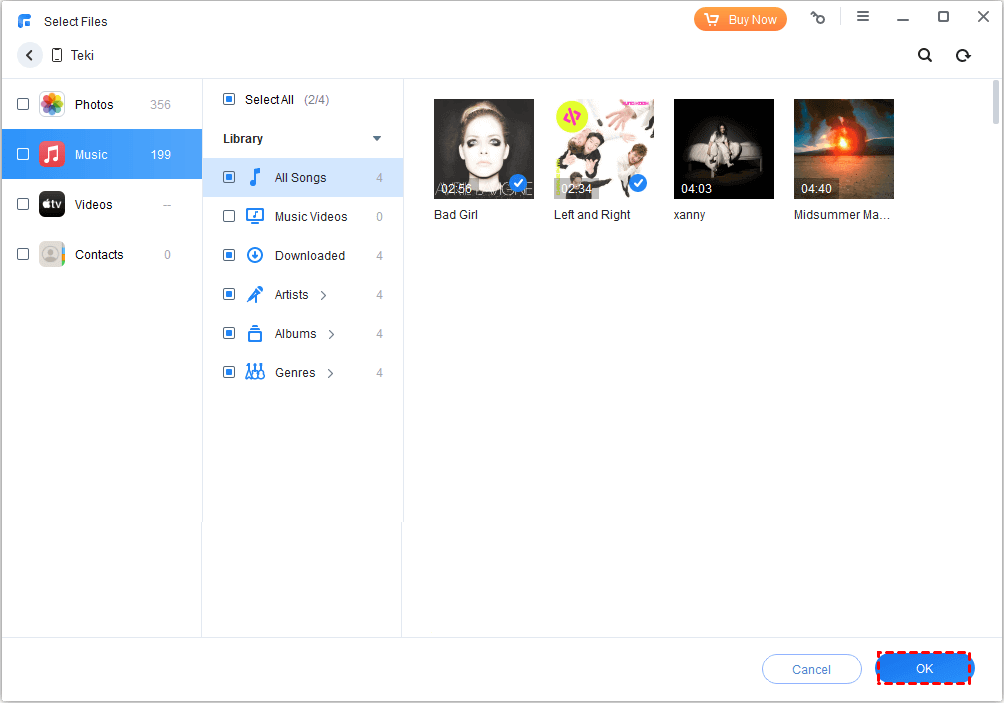
Step 3. Check the Music icon and select the songs you want to transfer to USB, tap OK to confirm.
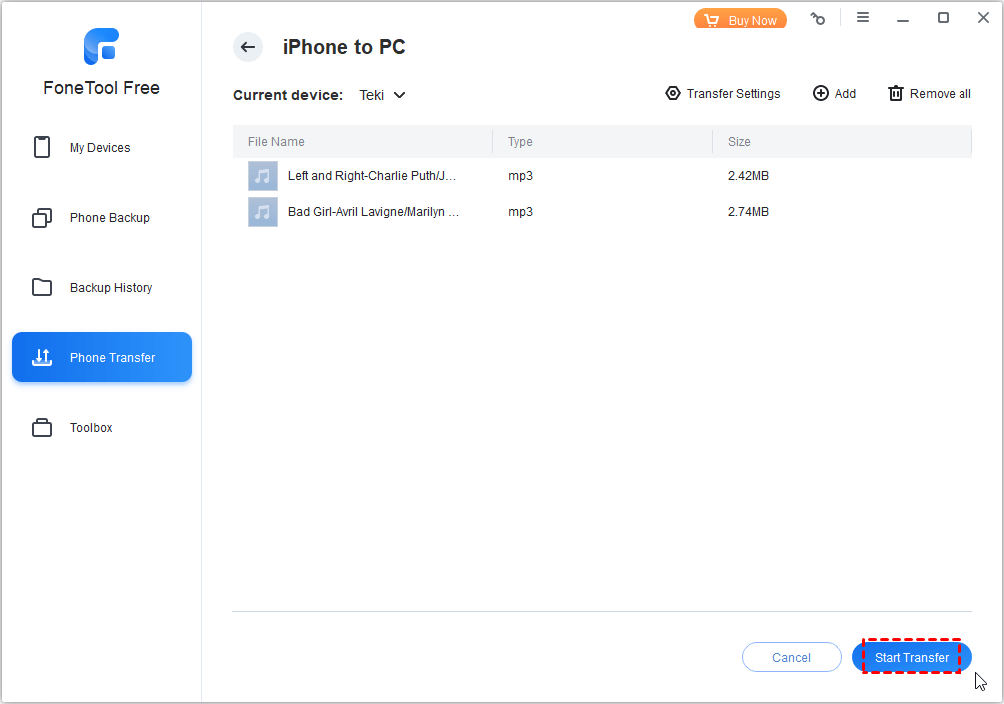
Step 4. From Transfer Settings, choose your USB stick as the storage path and click Start Transfer.
✨Why choose FoneTool?
- Save time: Transfer is completed in just a few clicks.
- Reliable: Trusted by millions of users around the world.
- Multi-function: Not only can you transmit music, but you can also transfer photos, videos, contacts, etc.
- Free to try: Download free software to experience more features, such as backing up iPhone music, making ringtones, etc.
Option 2. Transfer Music from iPhone to USB with iTunes
iTunes is the media player and manager developed by Apple Inc. You can utilize it to sync iPhone music to iTunes, and import music tracks to your USB stick. Follow the steps below to learn how to download music from iPhone to USB with iTunes.
Step 1. Connect your iPhone and USB stick to computer > Launch the latest version of iTunes on your computer.
Step 2. Select Edit > Preferences > Devices > Uncheck the box next to Automatically sync when this iPhone is connected, and check Manually manage music and videos.

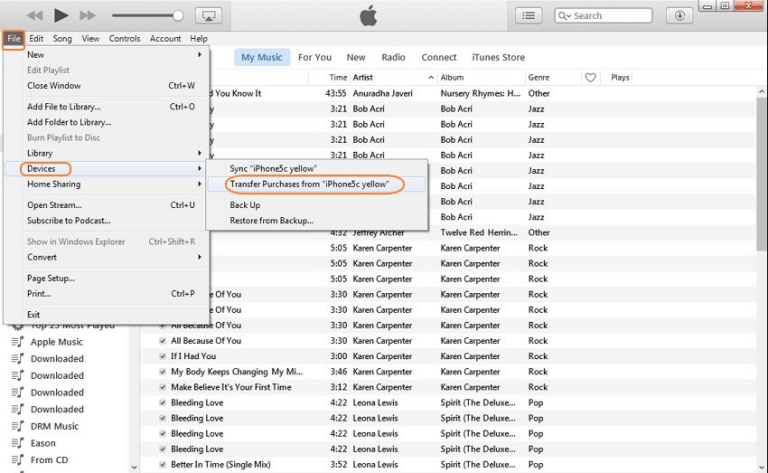
Step 3. Then, go to Files in iTunes > Click Devices > Tap Transfer Purchases from [device name].
Step 4. Finally, choose your USB stick as the destination to save your iPhone music files, and wait for the transfer process to finish.
- Notes:✎...
- iTunes has some limitations to transfer iPhone music; it does not support selectively transferring music files, and only supports transferring purchased music.
In the End
Whether you have a computer or not, it is easy to transfer music from iPhone to USB stick. With the Lightning to USB adapter, you can directly transfer your favorite songs to a USB without computer. If you have a computer, tools like FoneTool and iTunes can make the process more efficient. Now you can enjoy your music on any device, anywhere!
If you found this guide helpful, let us know in the comments below or share it with others who may benefit.
FoneTool - All-in-one iPhone Data Manager
Transfer, backup and manage data on iPhone, iPad and iPod touch in an easy way.
-
 iOS 26 Compatible
 iPhone 16 Supported
Windows 11/10/8/8.1/7
100% Secure
Kelsey is an English editor of FoneTool. She is passionate about helping people find effective ways to deal with all problems in phones and computers. She has great insights into iPhone backup and transfer, data recovery and phone data management, and other data protection measures. She likes to learn IT skills to improve herself and enjoy quality time with family and friends.
Read author info >>