How to Recover Photos from iPhone that Won’t Turn On [2024]
Do you know how to recover photos from iPhone that won’t turn on? Well, this post will show you several useful ways to help you recover photos from iPhone that won’t turn on.
Can I get my old photos off of my iPhone that won’t turn on?
My iPhone is completely broken. There is no way to turn the iPhone on at all, is there any way to get photos from iPhone that won’t turn on?
- Question from an iPhone user
An iPhone that won’t turn on can lead to various complications, one of which includes the inability to access your photo library. This predicament becomes especially challenging when all of your photos are stored separately on the device, and it’s impossible to access them without the iPhone being turned on. Fortunately, there are easy ways to guide you how to recover photos from iPhone that won’t turn on.

How to Recover Photos from iPhone that Won’t Turn On Without Backup
To recover photos from iPhone that won’t turn, one of the easiest ways is to use FoneTool - a professional and reliable iPhone data recovery utility. It specializes in retrieving a wide range of iOS data, such as photos, videos, messages, contacts, etc. from iPhone, iPad and iPod. It is worth noting that FoneTool is unique in that it makes sure data integrity throughout the recovery process.
Highlights of Using FoneTool to Recover Photos from iPhone that Won’t Turn On:
Selective Recovery: With this iPhone data recovery software without backup, you can selectively choose which photos they want to recover, saving time and storage space by not restoring unnecessary files.
Supported Various Photo Formats: FoneTool supports a wide range of photo formats, including JPEG, PNG, HEIC, etc., which ensures that you can recover almost any type of photo files from your iPhone.
Preview Before Recovery: FoneTool enables you to preview the recovered photos before completing the recovery process, giving you full control over the recovered data.
User-Friendly Interface: FoneTool offers an intuitive interface that allows users to easily navigate and use the software even if they are not technically savvy.
Below is how to get photos off an iPhone that won't turn on using FoneTool. Read on to get started:
Step 1: Download and install FoneTool to your PC. After that, connect your iPhone to your computer using the original lightning cable.
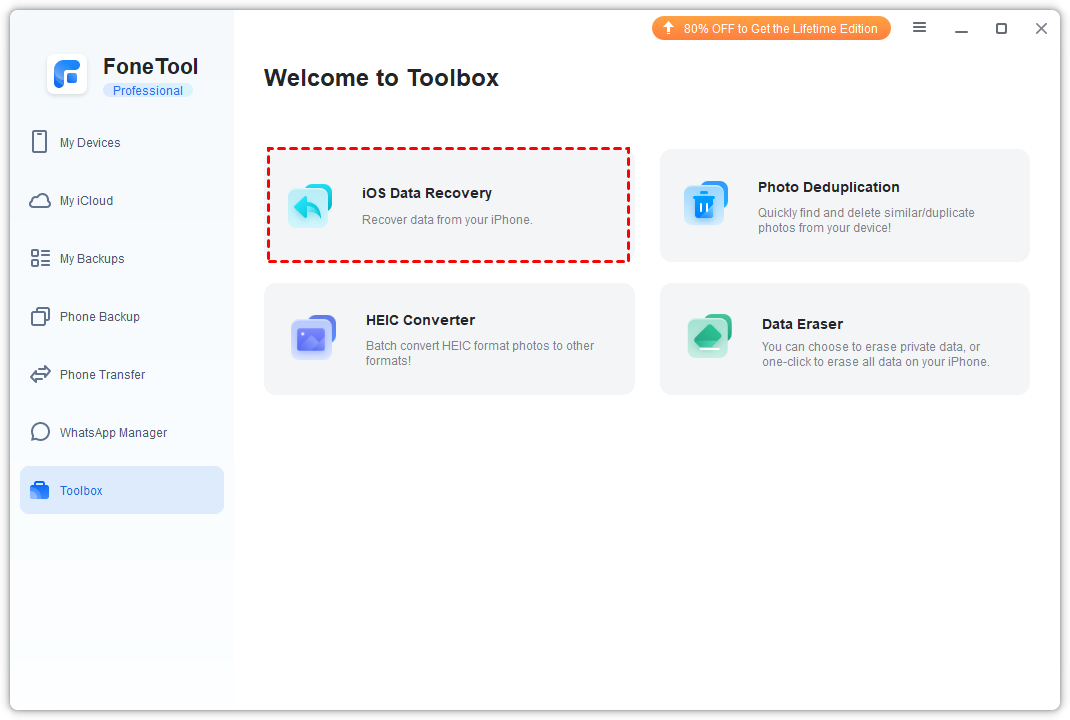
Step 2: Launch FoneTool on your PC and navigate to the Toolbox section. From there, select iOS Data Recovery.
Step 3: Locate and click the Photos icon, then click the Start Scan button to initiate the scanning process.
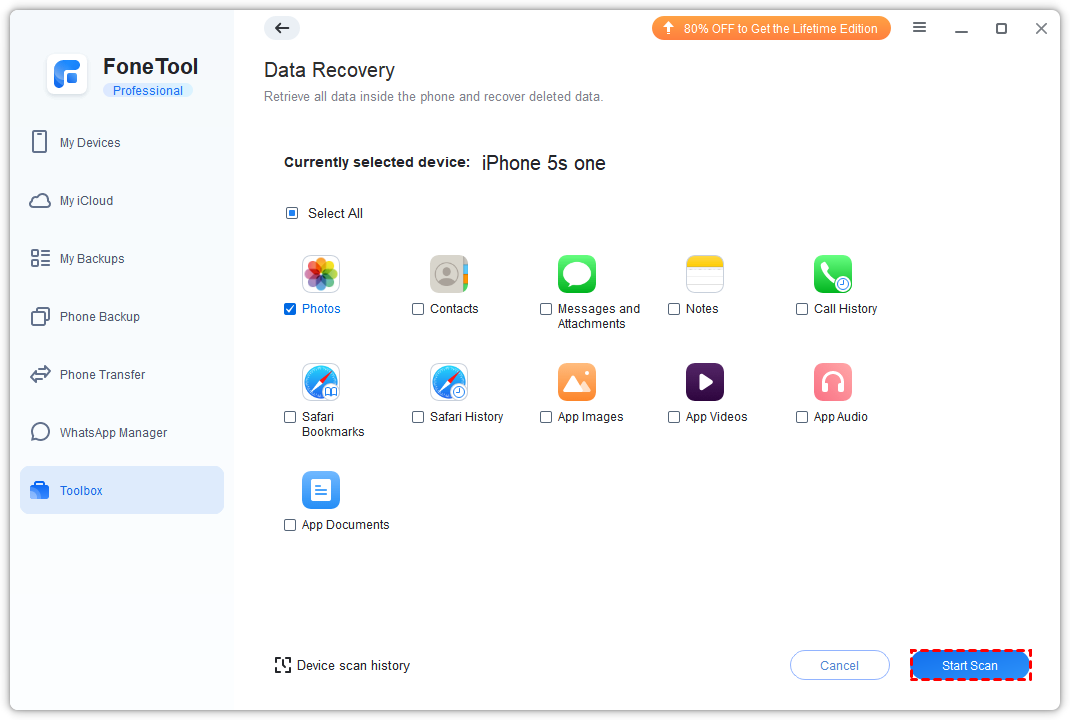
Step 4: Once the scan is complete, browse the results and select the photos you want to recover. Click Recover to PC to retrieve the selected photos from your iPhone.

Also Read: How to Recover Data from Dead iPhone Without Backup [2024] >>
How to Recover Photos from iPhone that Won’t Turn On with Backup
If you have backups of your iPhone, you are lucky. There are 2 ways to recover your photos from iCloud or iTunes backup. Scroll down to learn how to retrieve photos from iPhone that won’t turn on.
# Recover Photos from iPhone That Won't Turn on via iCloud
You can choose to recover photos by synchronizing an iPhone that won’t turn on with another iOS device under the same iCloud account. This process requires another available iPhone, either newly purchased or an existing device that’s already set up.
If you’re using a new device, follow these steps:
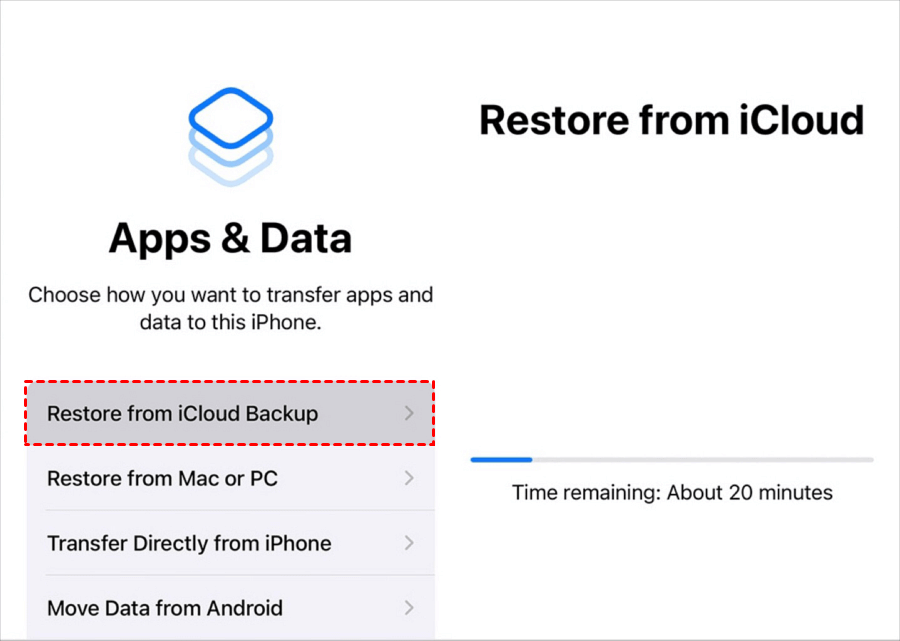
Step 1: Start by setting up your iPhone as you did initially. When prompted by the Apps & Data screen, select Restore from iCloud Backup.
Step 2: Select the most recent iCloud backup that contains your photos.
For devices that are already set up, follow these steps:
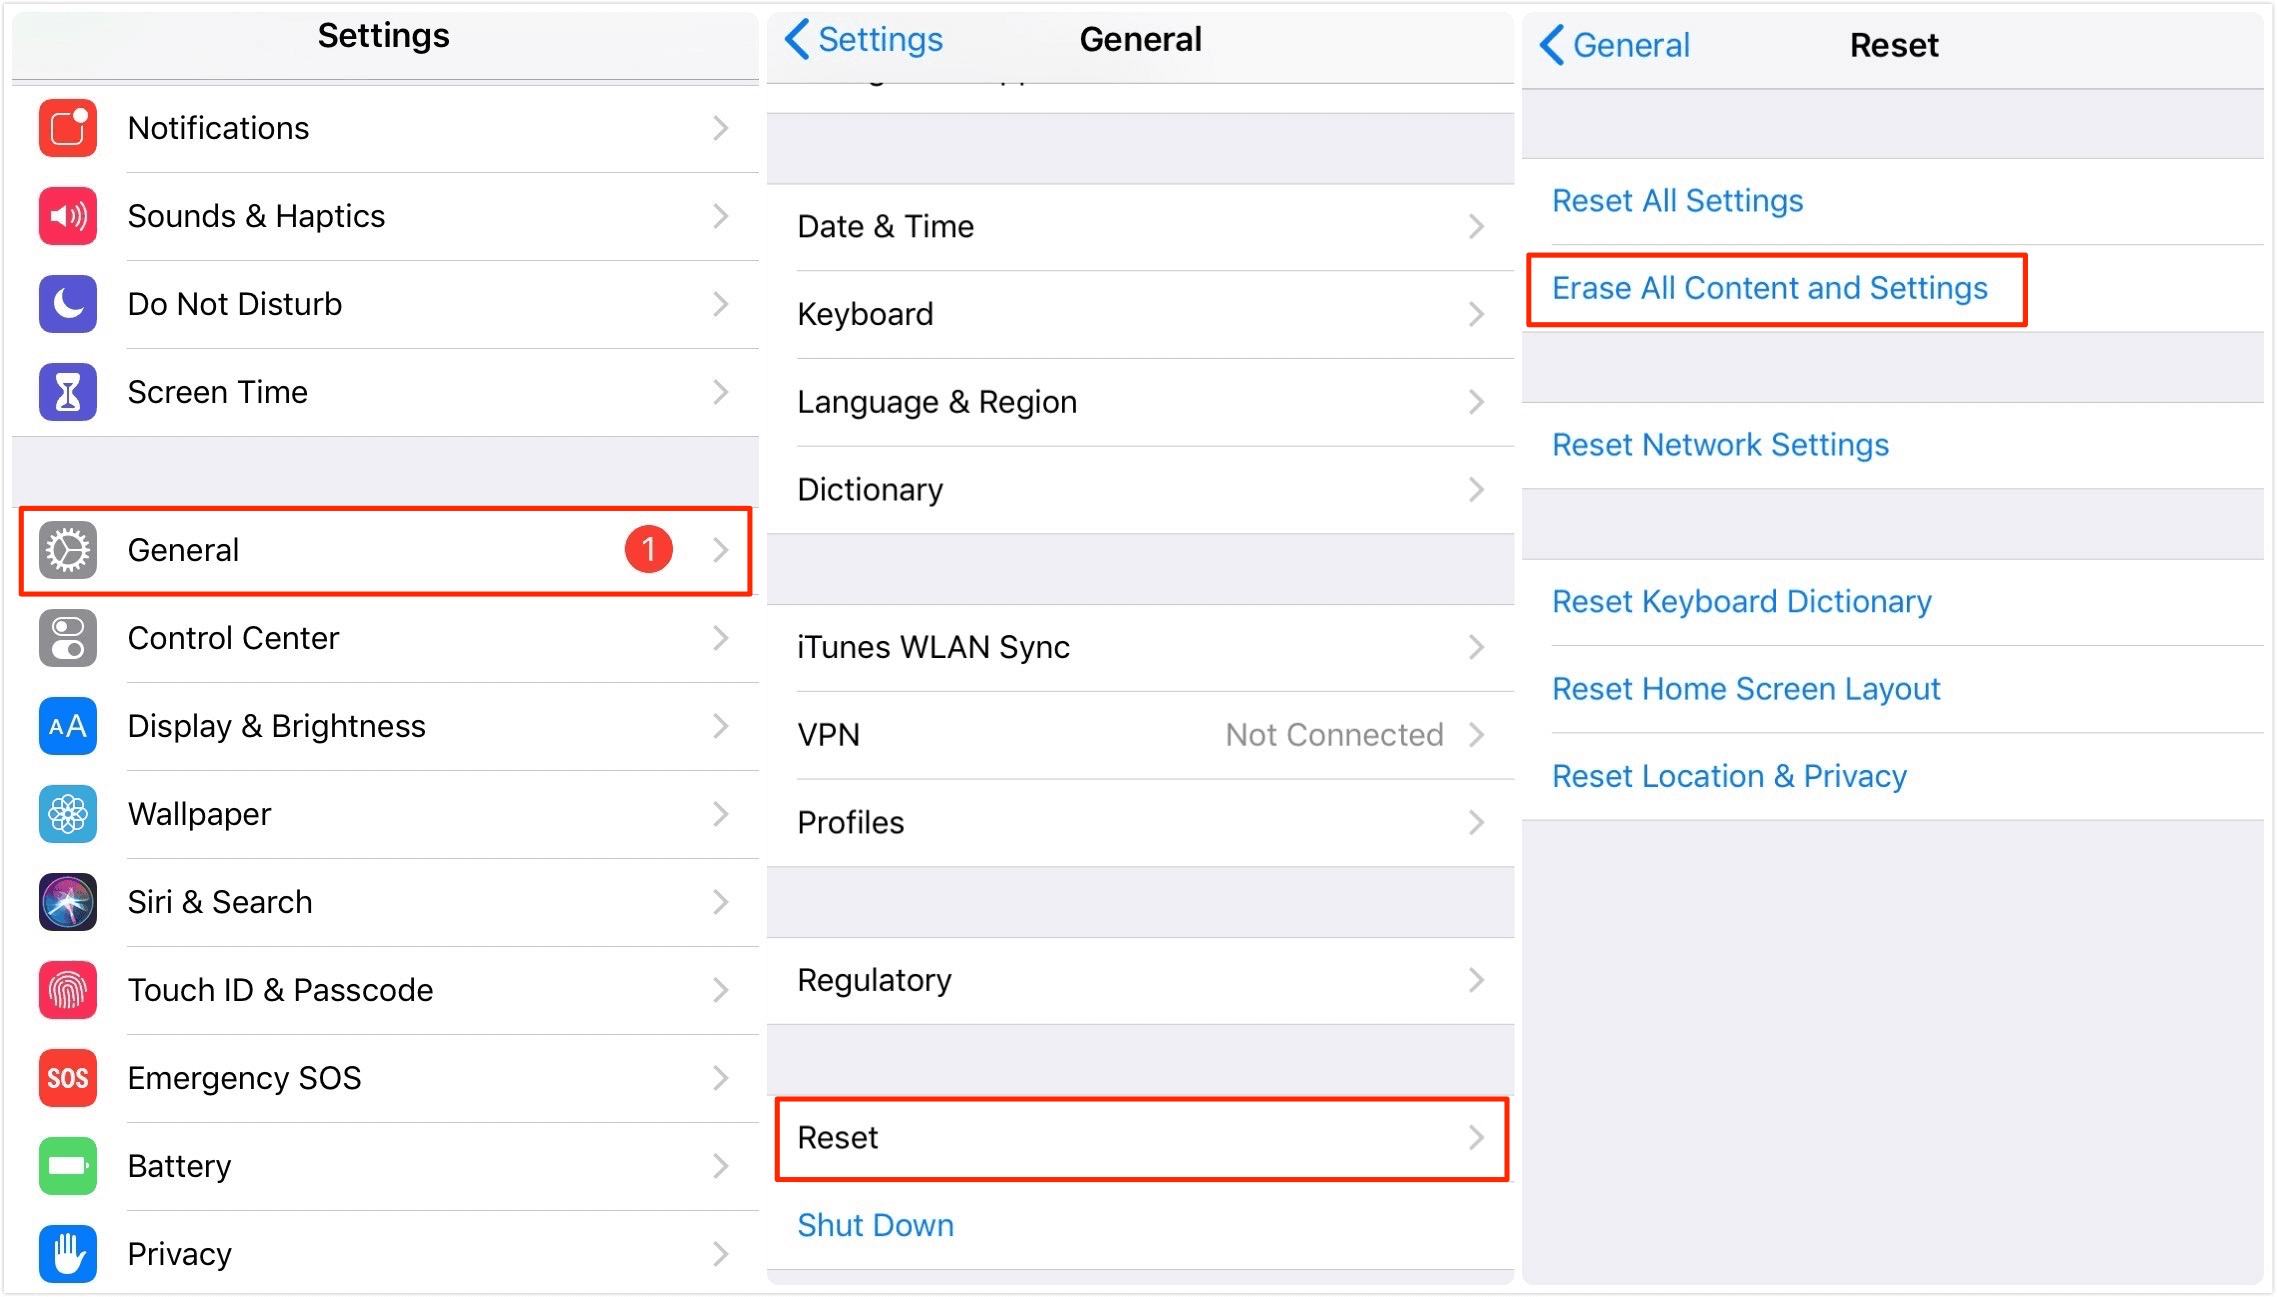
Step 1: First erase your device: Go to Settings > General > Reset > Erase All Content and Settings.
- ★Tip:
- This will completely erase all data on your iPhone, so please make a full iPhone backup to avoid data loss.
Step 2: After resetting, your iPhone will restart and guide you through the setup process.
Step 3: When you reach the Apps & Data screen, select Restore from iCloud Backup and select the backup that contains the photos you want.
# Get Photos off iPhone That Won't Turn on via iTunes
If you have created an iTunes backup, you can choose to use iTunes to achieve the same result. This method also requires another iOS device with plenty of storage space. Here’s how to get photos off iPhone that won’t turn on via iTunes:
Step 1: Connect your iPhone to a PC and launch the latest version of iTunes > Locate and click the device icon located in the upper left corner of the iTunes interface.
Step 2: Navigate to the Summary tab in the left sidebar > In the Backups section, select Restore Backup.
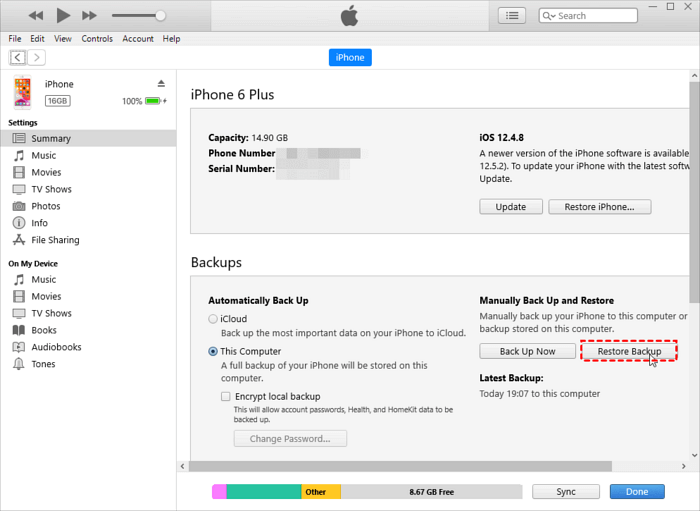
Step 3: Select the specific backup you want to restore > Finally, click Restore to start the recovery process.
The Bottom Line
After reading this guide, you may know how to recover photos from iPhone that won’t turn on. FoneTool becomes the top solution when dealing with challenging situations with iOS devices. Using this recovery tool, you can easily and quickly recover your photos even if your iPhone won’t turn on. Besides, FoneTool can help you recover deleted photos from photo vault iPhone with ease.
FoneTool - All-in-one iPhone Data Manager
Transfer, backup and manage data on iPhone, iPad and iPod touch in an easy way.
-
 iOS 18 Compatible
 iPhone 16 Supported
Windows 11/10/8/8.1/7
100% Secure

May is an editor who is passionate about sharing computer tips and providing reliable solutions, specializing in iOS/Android and file backup and recovery. In her spare time, May enjoys watching movies, going shopping, or chatting with friends.
Read author info >>