iTunes Doesn't Recognize iPhone: Reasons & 10 Top Fixes
When your iPhone is disabled connect to iTunes, you can use a professional iPhone data & backup software named FoneTool to sync iPhone data in simple clicks, or use other 9 ways mentioned here to solve the problem!
iTunes, the official iPhone sync software provided by Apple for Windows users, allows you to transfer data between your iPhone and PC or back up iPhone data to your computer. However, sometimes when you connect your iPhone to a Windows PC via a USB cable and open iTunes, the device may not be recognized. Why doesn't iTunes recognize my iPhone and how can quickly fix it? This article provides all the answers you need.

Why iTunes doesn't recognize iPhone?
If iTunes isn't recognizing your iPhone, it could be due to a number of reasons including:
❌️ An outdated iOS version
❌️ A faulty USB cable
❌️ Debris in the iPhone's charging port
❌️ Not allowing your computer to trust the iPhone
❌️ Issues with your computer's USB ports
......
You should always check to ensure your iPhone is unlocked and that you've updated both your iPhone and iTunes software to the latest versions.
Best alternative to fix iPhone is disabled connect to iTunes
When you urgently need to transfer data between your iPhone and PC or back up iPhone data to your computer, and your USB connection is working properly, instead of spending a lot of time troubleshooting and fixing iTunes issues, a professional iPhone data transfer and backup software called FoneTool would be a better choice.
Free & Non-Error iPhone Data Transfer/Backup Software
- Transfer unlimited photos, videos, ringtones, etc. Between iPhone and PC.
- Directly backup iPhone to PC, USB drive, SSD, etc. as you like.
- 46 GBs of data can be transferred to PC within 39 mins (Tested).
- No data loss & unknown errors in all data transfer/backup processes.
- Easy-to-use interfaces allow you to move all your iPhone data in 3 steps.
Windows 11/10/8/8.1/7
100% Secure
Now you can download FoneTool to transfer data from iPhone to PC without any limitation.
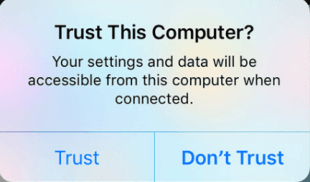
Step 1. Connect your iPhone to the computer with a reliable USB cable > If asked, tap Trust on iPhone to continue.
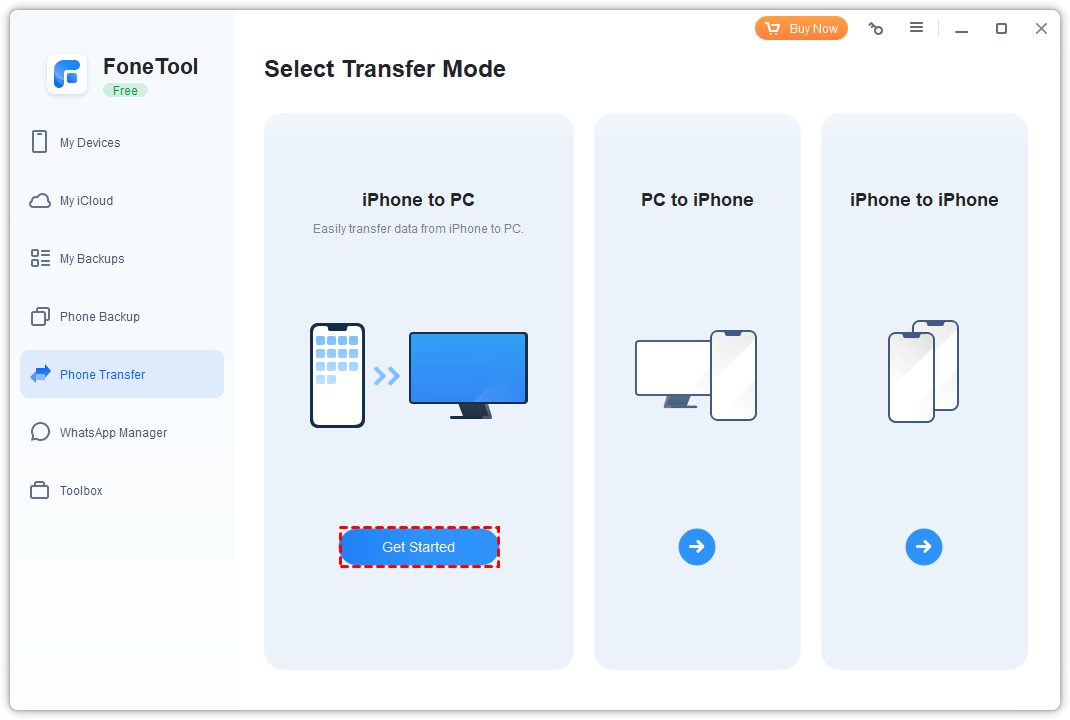
Step 2. Launch FoneTool and go to Phone Transfer > Choose iPhone to PC and click Get Started.
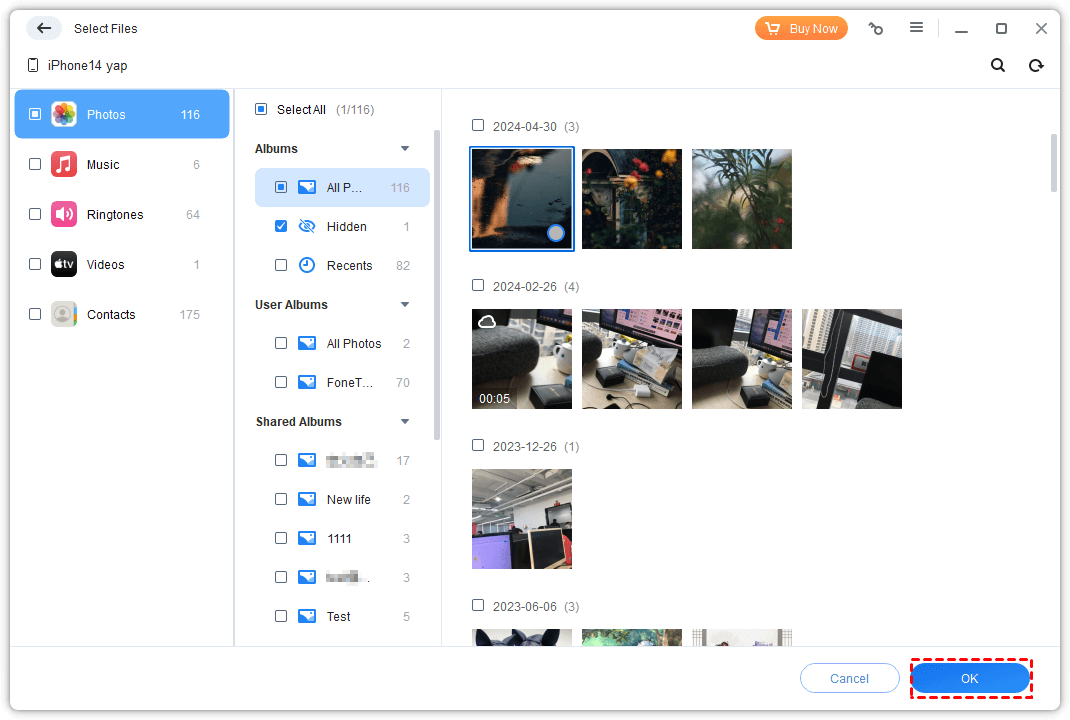
Step 3. Choose the targeted files icon > Select the data you need to transfer and click OK.
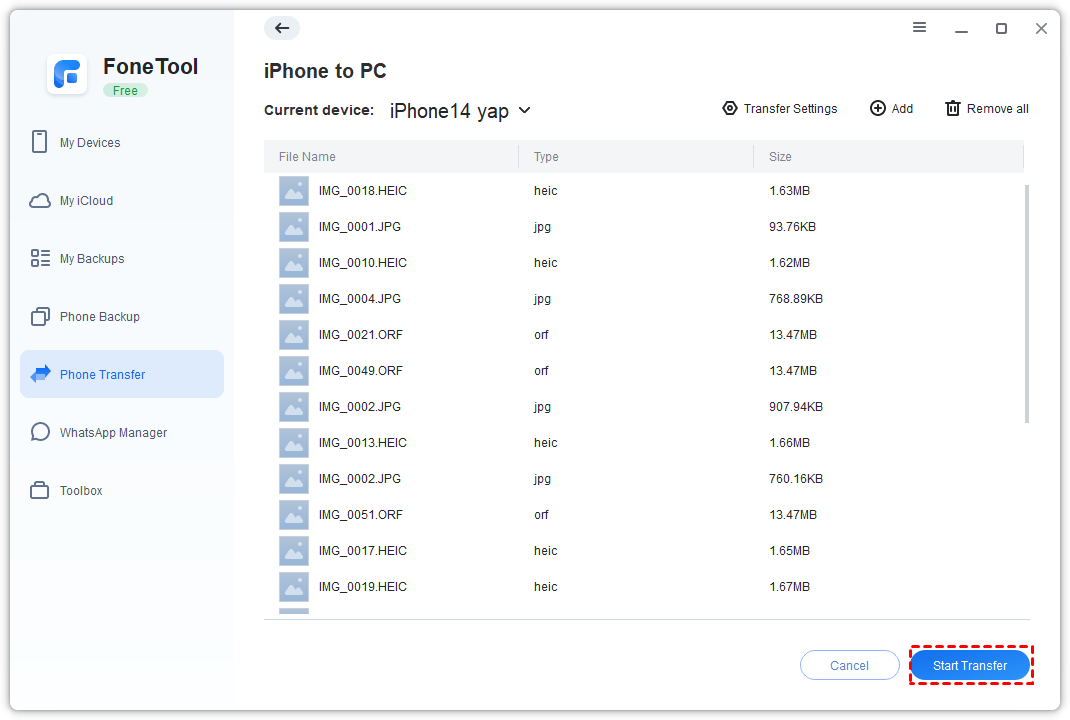
Step 4. If necessary, change file storage location from the Transfer Settings to save data to PC > Click Start Transfer to begin.
9 common ways to fix iTunes not detecting iPhone Windows 11/10
If you don't want to rely on any third-party software to sync your iPhone data, you can keep on reading to get some common ways to fix the connection errors between your iPhone and iTunes/PC.
Solution 1. Check the USB cable
The first thing to check is whether the hardware is damaged. If the USB cable connecting your iPhone to the computer is damaged, it may cause an unstable connection or prevent the computer from recognizing the iPhone. Try using a different USB cable to re-establish the connection between your computer and iPhone.
Solution 2. Trust your computer
After connecting the iPhone to the computer with a data cable, you need to trust the computer on your iPhone to continue the connection. Just tap on Trust when a prompt appears to ask you if you would like to Trust this computer.
Solution 3. Clean the USB port of your device and computer
If iTunes not recognizing iPad/iPhone, it could be due to a faulty or dirty port on either the device or the computer. Dust and debris can disrupt the connection, preventing iTunes from recognizing the device. To fix this, try switching to a different USB port or carefully cleaning the existing one.
Additionally, using a dry, anti-static brush to clean both the phone and computer ports can help maintain a strong connection. Regularly cleaning the ports can also prevent future issues with iTunes and other devices, ensuring smooth and consistent connectivity.
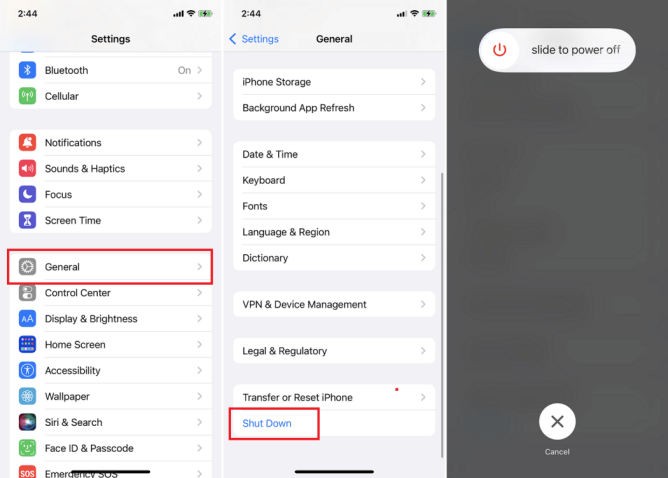
Solution 4. Restart your device
Except for the operations above, restarting your device is another available way to fix iPhone not showing up in iTunes.
Just open the Settings app > Choose General > Click Shut Down. Your iPhone will be turned off, then restart it by pressing the Power button. After that, you can connect your iPhone to the computer once again to check if the issue is fixed.
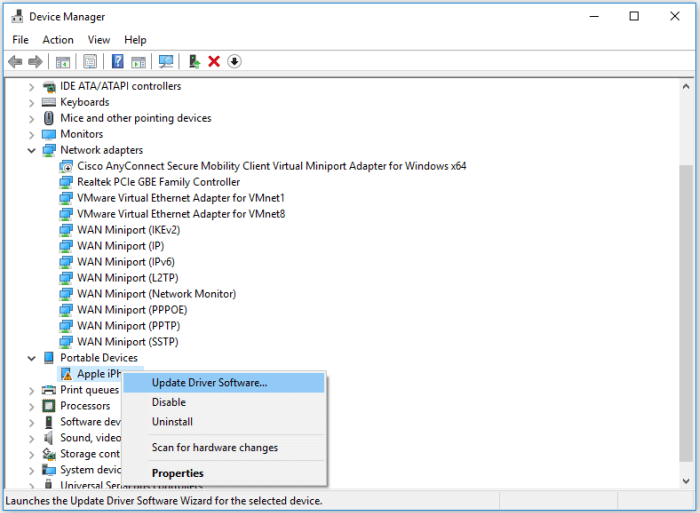
Solution 5. Update the Apple Mobile Device USB Driver
The Apple Mobile Device USB Driver is essential for your computer to recognize and communicate with your Apple device. If it's outdated or corrupted, your computer and iTunes may fail to detect your iPhone or iPad.
For Windows 10 and 11 Users:
Step 1. Unlock your iPhone and ensure it’s on the Home screen > Connect it to your PC using an Apple USB cable. If iTunes opens automatically, close it.
Step 2. Right-click the Windows icon in the bottom-left corner and select Device Manager > Expand the Portable Devices section > Right-click your connected device and choose Update driver Software.
Step 3. Select Search automatically for updated driver software > Open iTunes and try reconnecting your device.
For Other Windows Versions:
Step 1. Press Windows + R to open the Run dialog. In the proceeding 'Run' window, enter this location: %ProgramFiles%\Common Files\Apple\Mobile Device Support\Drivers and click OK.
Step 2. Locate usbaapl64.inf or usbaapl.inf, right-click it, and select Install > Restart your computer > Open iTunes and try connecting your device again.
Solution 6. Update your iPhone system
Running an outdated iOS version can lead to compatibility problems, which may lead to iTunes doesn't recognize iPhone. To solve this, follow these steps to update your device properly:
Step 1. Unlock your iPhone and open the Settings app > Scroll down and select General > Tap Software Update to check for available updates.
Step 2. You will see two options: Automatic Updates or Beta Updates > Choose the appropriate option and proceed with the update to ensure your iPhone stays compatible with iTunes and other software.
Solution 7. Reset the Privacy Settings on iPhone
If your iPhone has strict restriction settings, it may block iTunes from recognizing your device. To fix this, you need to reset the privacy settings and reconnect your iPhone to your computer.
Open the Settings app and go to General > Scroll down and tap Transfer or Reset iPhone, then select Reset > In the menu that appears, choose Reset All Settings and confirm your selection.
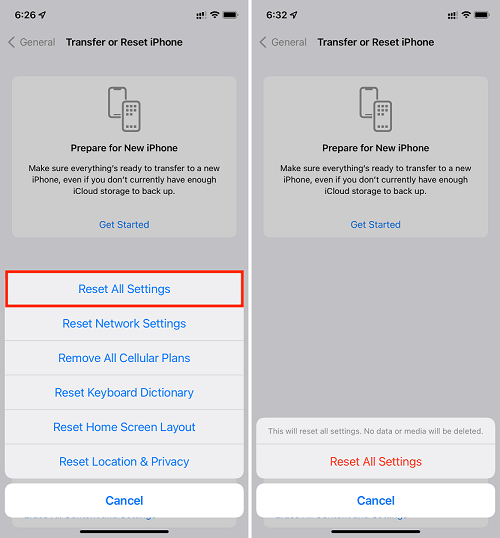
This will restore network, location, and privacy settings to default. Once the reset is complete, reconnect your iPhone to your computer and select Trust when prompted to allow iTunes access.
Solution 8. Install the Apple Devices Software
iTunes is being replaced by three new apps: Apple Devices for managing iPhones, iPads, and iPods, Apple Music for audio content, and Apple TV for video streaming. Going forward, iTunes will mainly be used for audiobooks and podcasts. To switch from iTunes to Apple Devices, follow these steps:
Step 1. Uninstall iTunes from your PC > Download and install Apple Devices from the Microsoft Store.
Step 2. When launching Apple Devices for the first time, you may see a prompt to remove Apple Mobile Device Support. Disconnect your device safely and click Continue to allow the app to update connection components.
Step 3. Reconnect your iPhone using a USB cable. Your device should now be recognized and displayed in the Apple Devices app.
Solution 9. Disable the Security Software
If your computer’s firewall is enabled, it might block your iPhone from connecting to iTunes. In some cases, security settings can mistakenly flag the connection as a potential threat. To resolve the "iPhone not found in iTunes" issue, temporarily disabling the firewall may help. Follow these steps to do so:
Step 1. Open the search bar at the bottom of your screen and type Windows Defender Firewall. Click on it to access the firewall settings.
Step 2. On the left panel, select Turn Windows Defender Firewall on or off.

Step 3. Under both Private and Public network settings, choose the option to turn off the firewall, then click OK.
Once disabled, try reconnecting your iPhone to iTunes to see if the issue is solved.
Conclusion
Here you can know how to fix when iTunes doesn't recognize iPhone.
- To sync data between iPhone and PC efficiently, you can choose a better iTunes alternative named FoneTool to easily transfer data from iPhone to PC and vice versa.
- To fix the issue and use iTunes normally, use the 9 common ways above.
Hope you can solve the problem quickly!
FoneTool - All-in-one iPhone Data Manager
Transfer, backup and manage data on iPhone, iPad and iPod touch in an easy way.
-
 iOS 26 Compatible
 iPhone 16 Supported
Windows 11/10/8/8.1/7
100% Secure

Kathy is an editor of FoneTool, who prefers to help more users address a series of iOS-related problems. She likes traveling and being close to nature makes her relax. She is also keen to engage in social activities and spend much free time with her friends.
Read author info >>