How to Make a Custom Ringtone for Your iPhone: Latest 3 Ways
Which way you can use to add custom ringtones to your iPhone? Get answers here and you can easily finish the process on various devices.
The iPhone offers a variety of ringtones, but why not personalize it with a custom ringtone for specific contacts? This way, you can instantly recognize who is calling. For instance, you can set a special song for your spouse, so you immediately know it's them when they call.
You can create a custom ringtone directly on your iPhone using GarageBand or on your Mac if you follow the right steps. Here’s how you can do it.
How to get custom ringtones on iPhone with GarageBand
If you're looking to create a unique ringtone, GarageBand on your iPhone is a great tool. Whether you want to start from scratch (though we won't cover how to create a song from scratch here) or edit an existing sound file, GarageBand makes it possible. Note that the ringtone must be no longer than 30 seconds.
Before you start editing in GarageBand, here are some preparation steps:
- Existing Sound File: Copy it to iCloud Drive.
- Editing a Song: Ensure you have the song file by either purchasing it online or ripping it from a CD. If the song is already on your iPhone, you can access it through GarageBand.
- Copy-Protected Files: These cannot be edited.
- Streamed Songs: Songs from Apple Music or other streaming services cannot be used as ringtones.
Here’s a step-by-step guide on editing a sound file in GarageBand on your iPhone and saving it as a ringtone.
Step 1. Launch GarageBand: Download it from the App Store if you haven't already. It's a large application, so the download might take some time. Tap Tracks at the top of the screen.
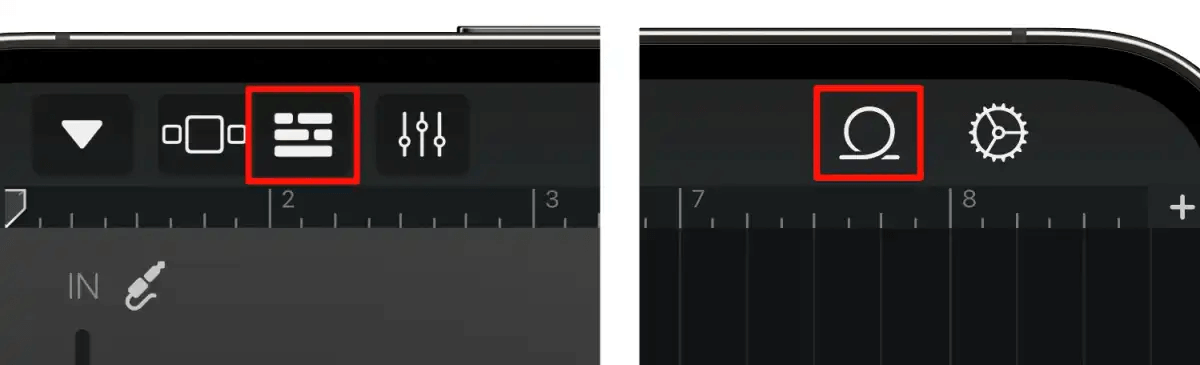
Step 2. Open Loop Browser: Tap the Loop Browser button on the upper right (it looks like a loop icon). If your file is on iCloud Drive, tap Files and then browse items from the Files app. If you're editing a song file, tap Music and navigate to your song.
Step 3. Drag File to Workspace: Press and hold the file, then drag it into the GarageBand workspace. Trim the track to 30 seconds.
Step 4. Time Ruler: For a visual cue, enable Time Ruler in Settings. Use the Play button to listen and tap the track to reveal trim bars. Drag the bars to adjust the song length.
Step 5. Optionally, you can cut sections, add effects, etc. Tap the Navigation button (the downward arrow) in the upper left. Select My Songs from the pop-up menu. Your project will appear as "My Song" in the GarageBand Recents window.

Step 6. Tap and hold the project, select Rename, and give it a new name. Tap and hold the project again, select Share, then choose Ringtone. Name the ringtone and tap Export.
After exporting, you'll be asked how you want to use the ringtone. You can set it immediately or later via Settings > Sounds & Haptics > Ringtone.
To set a ringtone for a specific contact, go to the contact's entry in the Contacts app, tap Edit, then Ringtone.
By following these steps, you can create and use a custom ringtone on your iPhone with ease.
How to make a custom ringtone for iPhone on Windows PC
When you need to make a custom ringtone for your iPhone from PC, the professional ringtone maker - FoneTool will be your most ideal choice.
- Advantages:
- You can easily choose source files from your iPhone to edit them from the PC.
You can edit various audio files including mp3, m4a, m4b, m4p, m4r, aif, aiff, flac, wav, aac, etc. as you like on the computer.
FoneTool runs stably on all Windows systems, so all your editing processes can be finished efficiently.
Various iOS devices and iOS versions can be supported, even the latest ones.
Now you start the ringtone editor app download process, then follow the steps below to learn how to make it.
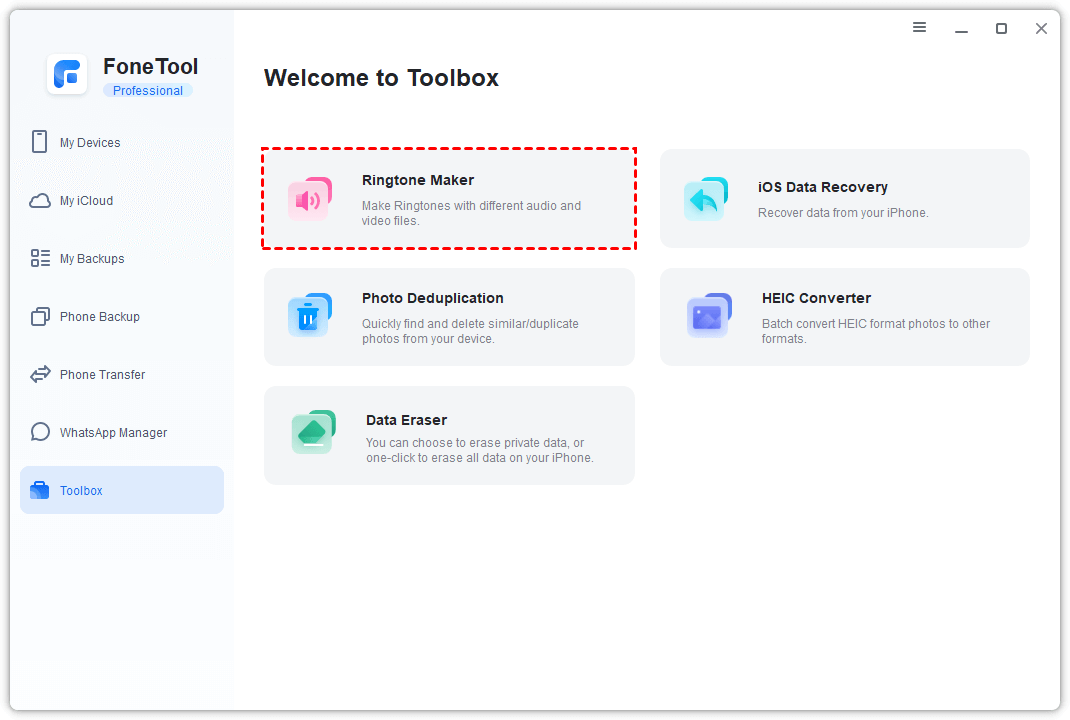
Step 1. Connect your iPhone to the computer > Launch FoneTool > Go to Toolbox > Tap on Ringtone Maker to continue.
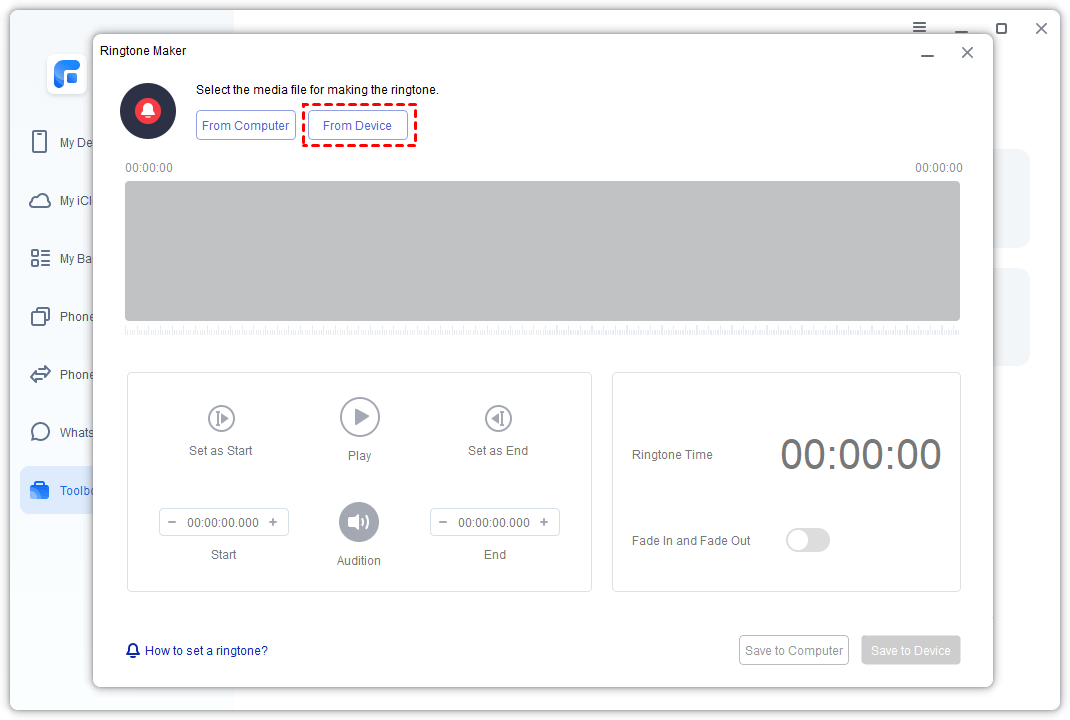
Step 2. Choose From Device to select the music you need.
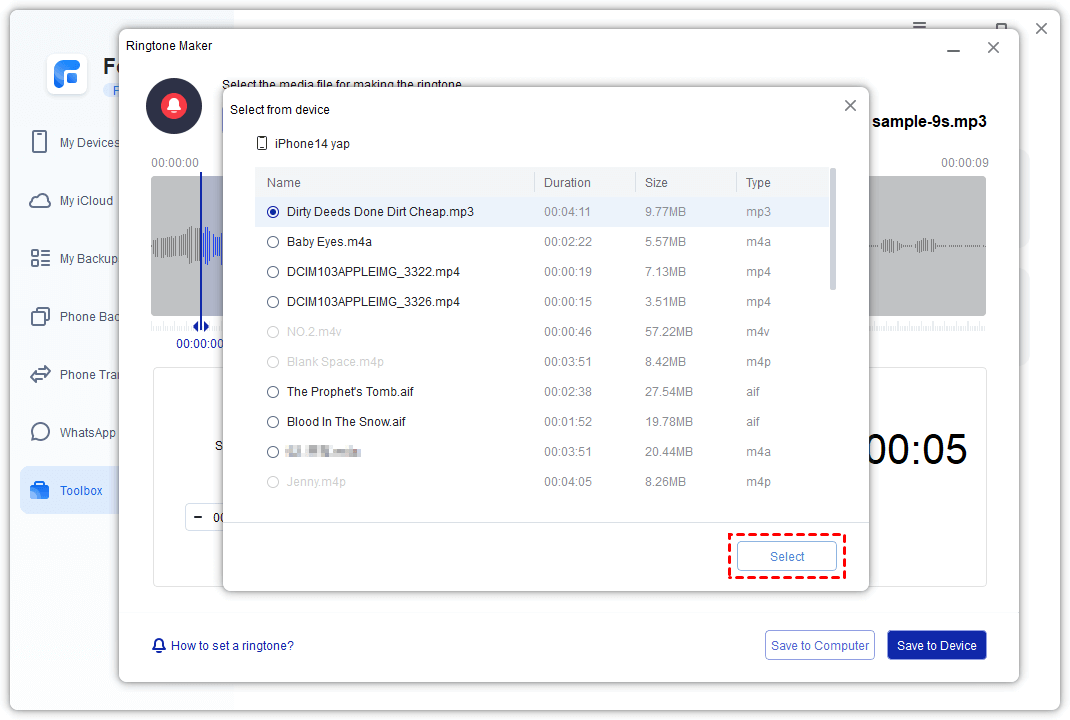
Step 3. Choose the music files on your iPhone > Click on Select.
Step 4. Edit the music as you like > Once you have finished the process, tap on Save to Device to save it > Click on Save from the pop-up window to finish the process.

Once the process is finished, you can easily find ringtones on your iPhone and set them as your iPhone ringtones (Settings > Sounds & Haptics > Ringtone).
How to add custom ringtones to iPhone on Mac
If your music collection is on your Mac, you can use Apple Music to create ringtones. Keep in mind that you must own the song file; streamed songs cannot be used for ringtones. Additionally, the files should not be copy-protected. Here are detailed steps to make it right now.
Part 1. How to make a custom ringtone in Apple Music
Step 1. Open the Music app.
Step 2. Find the Song: Go to your music library and locate the song you want to turn into a ringtone > Play the song and take note of the start and end times for the ringtone segment (no longer than 30 seconds).
Step 3. Get Song Info: Right-click on the song and select "Get Info" from the pop-up menu.
Step 4. Set Start and Stop Times: In the window that appears, click on "Options." Check the "Start" box and enter the start time. Do the same for the "Stop" box and enter the end time. Click "OK."
Step 5. Create AAC Version: Select the song file, then go to the File menu and choose Convert > Create AAC version. (If you only see "Create MP3 version," select it.)
Step 6. Find the New File: A new copy of the song will appear. Right-click on it and select "Show in Finder."
Step 7. Change the File Extension: In Finder, check the file extension. If it doesn’t display, right-click the file, select "Get Info," and look under "Name & Extension."
![]() Note:
Note:
1. If the extension is .m4a, change it to .m4r.
2. If it’s .mp3, convert it to .m4a by opening it in QuickTime Player. Then select "File > Export As > Audio Only," save the file, and change its extension to .m4r.
Part 2. How to transfer the ringtone from Mac to your iPhone
Now that your ringtone file is ready, follow the next steps to install it on your iPhone.
Step 1. Connect iPhone to Mac: Use a USB cable to connect your iPhone to your Mac.
Step 2. Open Finder: Press Command-N to open a new Finder window.
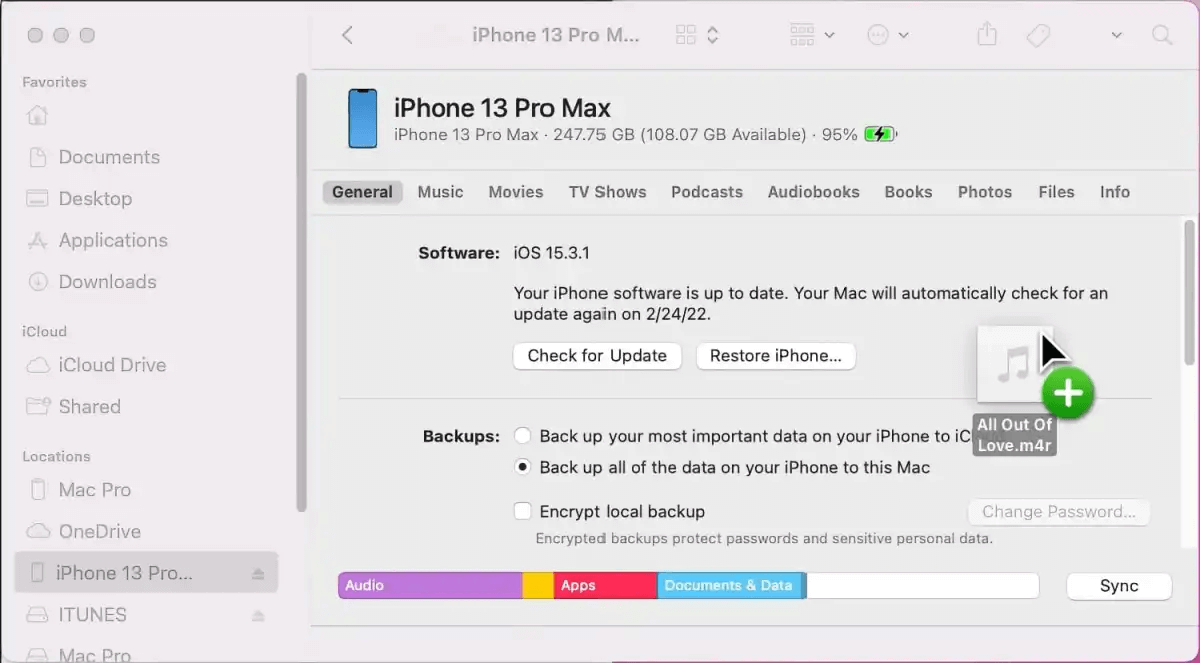
Step 3. Select your iPhone: In the Finder sidebar, look for your iPhone under "Locations" and select it.
Step 4. Drag and drop ringtone: Locate the .m4r ringtone file on your Mac. Drag the file to the Finder window with your iPhone selected. When a green “+” icon appears, drop the file to transfer it to your iPhone.
Step 5. Verify the ringtone: On your iPhone, go to the Settings app.
Step 6. Navigate to Sound & Haptics > Ringtone. Your new custom ringtone will appear at the top of the list with any other custom ringtones.
And that’s it! Your custom ringtone is now loaded onto your iPhone.
Conclusion
Now you can know how to make a custom ringtone for your iPhone on your device directly or using a Mac or Windows PC. Detailed steps are all listed here, hope you can easily finish the process as you like.
If this guide is useful for you, you can share it with other people to help them.
FoneTool - All-in-one iPhone Data Manager
Transfer, backup and manage data on iPhone, iPad and iPod touch in an easy way.
-
 iOS 26 Compatible
 iPhone 16 Supported
Windows 11/10/8/8.1/7
100% Secure

Kathy is an editor of FoneTool, who prefers to help more users address a series of iOS-related problems. She likes traveling and being close to nature makes her relax. She is also keen to engage in social activities and spend much free time with her friends.
Read author info >>