iTunes Stuck on Preparing iPhone for Restore? Top 9 Ways
Have you encountered the issue of “iTunes stuck on preparing iPhone for restore”? Don’t worry! Read this post to learn potential causes for this issue and corresponding ways to rectify the issue.
iTunes has a variety of features, including backing up and restoring your iPhone or iPad data, updating your iOS software, and resetting your device to factory settings. Recovery essentially means installing a new version of firmware on your iOS device. Usually, when the recovery process is working properly, the preparation phase shouldn't take long to continue.
However, you may encounter an issue “iTunes stuck on preparing iPhone for restore” and the progress bar refuses to move while preparing your iPhone for recovery. Well, this guide will provide several effective ways to the stuck issue to ensure that you can successfully update and restore your iPhone.
Why Is My iTunes Stuck on Preparing iPhone for Restore?
If your iTunes is stuck on preparing iPhone to restore, there could be several reasons for this issue. Here are some possible causes:
- USB Connection Issues: A faulty or loose USB cable or port may interrupt communication between your iPhone and iTunes, stalling the recovery process.
- Outdated iTunes Version: An outdated version of iTunes may not be fully compatible with your iPhone, causing problems in the recovery process.
- Software Conflicts: Other software running on your computer, such as antivirus or firewall programs, may interfere with iTunes' ability to communicate with Apple servers or devices.
- Corrupted iOS Firmware: If the iOS firmware file you are attempting to install is corrupt or incomplete, it may cause iTunes to hang during the recovery process.
- ...
Resolving these issues usually involves troubleshooting steps such as checking the USB connection, updating iTunes, etc.. Scroll down to fix stuck on preparing iPhone for restore.
How to Fix iTunes Stuck on Preparing iPhone for Restore
Experiencing the “iTunes stuck in preparing iPhone for restore” issue can be quite frustrating, especially if it's been going on for a long time. So, what to do if iPhone is stuck while restoring? Fortunately, there are 9 ways you can take to fix the problem.
Way 1. Restart Both Your iPhone and PC
When faced with a problem on either your computer or iPhone, your first course of action should be to reboot both devices. A simple restart often resolves minor glitches and could be the key to overcoming the restore issue.
# Restarting Your iPhone:
- Press and hold the Power button > Slide to power off your iPhone.
- Once the device is off, press and hold the Power button again to turn it back on.

# Restarting Your PC
- Click the Start Menu, choose the Power option, and then select Restart.
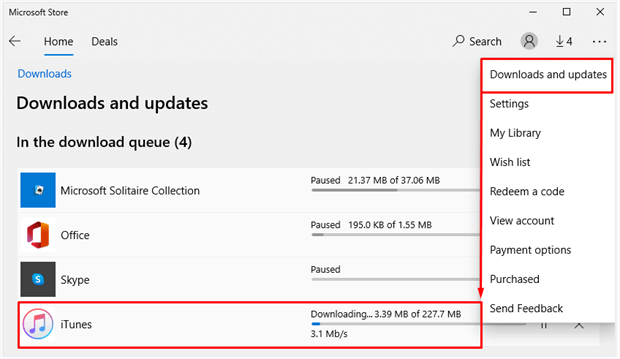
Way 2. Update iTunes on PC
To ensure smooth operation, it's critical to keep your iTunes version up to date. An outdated version can cause malfunctions and result in iTunes stuck on preparing iPhone for restore. Here's how to update iTunes:
Step 1. Locate Apple Software Update in your computer's Start Menu and open it.
Step 2. Allow the software to search for any available iTunes updates. If there's an update, simply click the Install button located at the bottom.
Also Read: 6 Solutions to iTunes Update not Working on Windows 11/10/8/7 >>
Way 3. Check Your Internet Connection
Do you realize that a weak internet connection may be the reason why iTunes is stuck on preparing the iPhone to restore? A weak internet connection may cause issues like “iPhone connected to WiFi but apps not working”, etc. A strong and reliable Internet connection is essential for the recovery process to run smoothly.
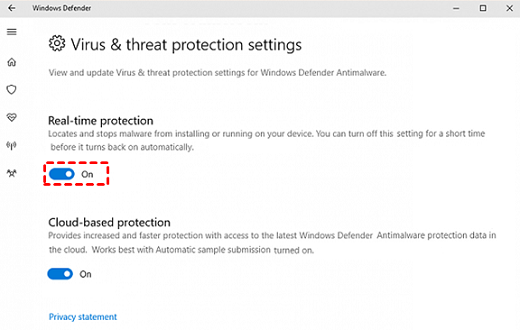
Way 4. Disable Antivirus Software
An interesting solution to the “iTunes stuck on preparing iPhone for restore” problem is to disable the antivirus software temporarily. Antivirus programs are essential to protect your device from malicious threats and keep your valuable data safe.
However, sometimes such protection software can unintentionally disrupt the update or recovery process. To disable that:
Step 1. Initiate the process by clicking the Start button, proceeding to select the Settings button to access the Settings menu, and then choose Update & Security.
Step 2. Within the left panel, navigate to Windows Security, select Virus & threat protection, proceed to Manage settings, and finally, deactivate Real-time protection.
Way 5. Utilize a USB 2.0 or Superior Port
Experienced users often recommend using a USB 2.0 or faster port on your computer when updating or restoring your iOS device. Outdated USB ports may make it difficult to transfer data quickly, causing “iTunes stuck on preparing iPhone for restore”. Given that modern computers often have multiple USB ports, it is recommended that you choose the fastest available option for these tasks.
Way 6. Avoid Using USB Hubs
Using a USB hub may seem convenient when there are more USB devices than ports available on your computer. However, it is highly recommended not to use a USB hub as an intermediary when updating or restoring your iPhone.
Eliminate any USB hub that acts as an intermediary between your iPhone and your computer. Instead, establish a direct connection between the device and your machine to alleviate potential connectivity issues that may arise in the process.
Way 7. Use a Different Computer for iPhone Restoration
Sometimes, the root cause of iTunes-related issues may lie within your own computer. Potential problems with components of your computer may prevent successful recovery of your iPhone.
To easily bypass this potential obstacle, consider using another computer equipped with iTunes. Connect your iPhone to the other computer, launch iTunes, and then continue with the regular recovery process. This workaround has proven effective for many people and is worth exploring if you haven't tried it yet.
Way 8. Easily Repair Issue with FoneTool Repair
If you've tried all the above methods but iTunes remains stuck, the issue might be deeper iOS system corruption preventing a successful restore. FoneTool Repair specializes in fixing such system-level issues that can cause restoration failures.
This powerful iOS system repair tool is the best way to fix iOS/iPadOS issues without data loss
Step 1. Install and launch FoneTool Repair on your computer > Connect your iPhone via USB cable > Select iOS System Repair.
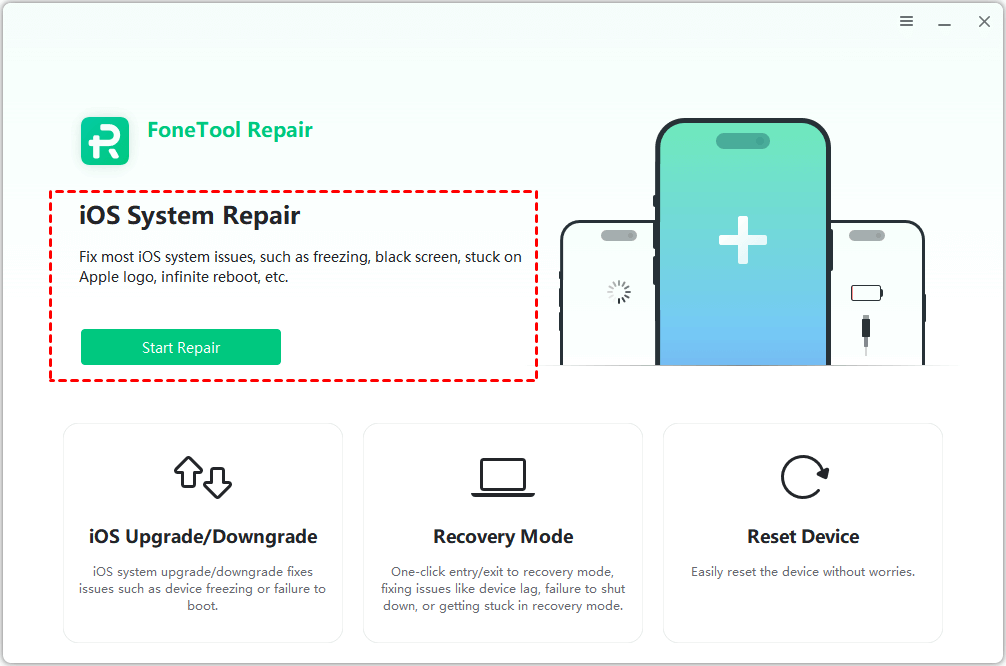
Step 2. Choose Standard Mode to fix the issue without data loss.

Step 3. Follow instructions to enter recovery mode > Download the firmware package.

Step 4. Click Start Repair to begin the system repair process.
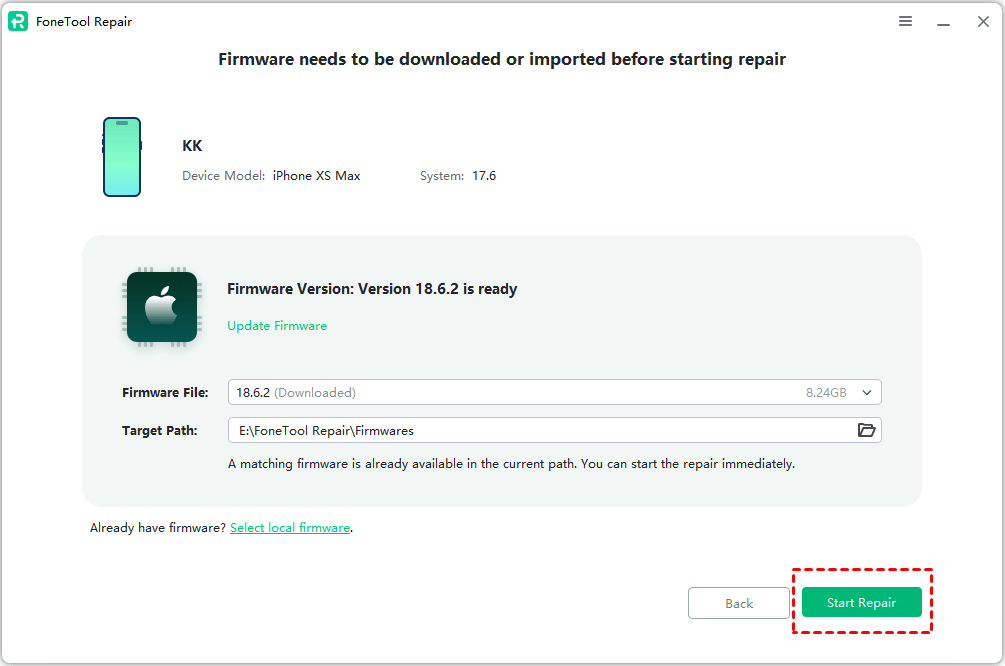
After completion, your iPhone will restart and the restoration issue should be resolved.
Way 9. Utilize the iPhone Recovery Mode
This unique mode acts as a beacon of hope when your device is experiencing serious problems, offering you a way to restore or update your iPhone during turbulent times. Here's a concise guide on how to direct your iPhone to Recovery Mode, utilizing the power of iTunes to coordinate a seamless recovery process:
Step 1. Make sure iTunes is ready on your computer > Establish a physical link between your iPhone and computer via a reliable USB cable.
Step 2. Enter Recovery Mode on your iPhone:
- For iPhone 8 or newer: Press and release the Volume Up and Volume Down buttons in sequence, then firmly grasp and hold the side button.
- For iPhone 7 or 7 Plus: Press and hold the Top or Side button and Volume Down button at the same time.
- For iPhone 6S or earlier: Press the Home and Top or Side buttons at the same time to combine forces.
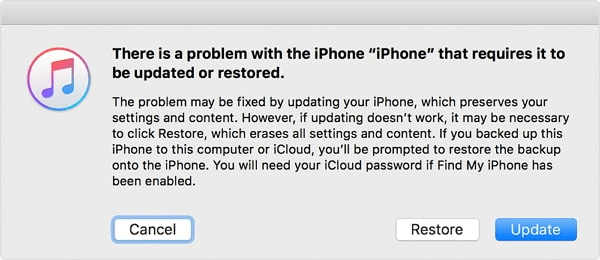
Step 3. iTunes will graciously prompt you with the option to restore or update your beloved device. Tap the Restore button to restore your iPhone.
Bonus Tip: An iTunes Alternative Tool to Backup and Restore iPhone
Experiencing the "iTunes stuck on preparing iPhone for restore" issue often? In this case, it is highly recommended to use FoneTool, a free and powerful iPhone backup tool, to back up and selectively to your iPhone data.
?Highlights:
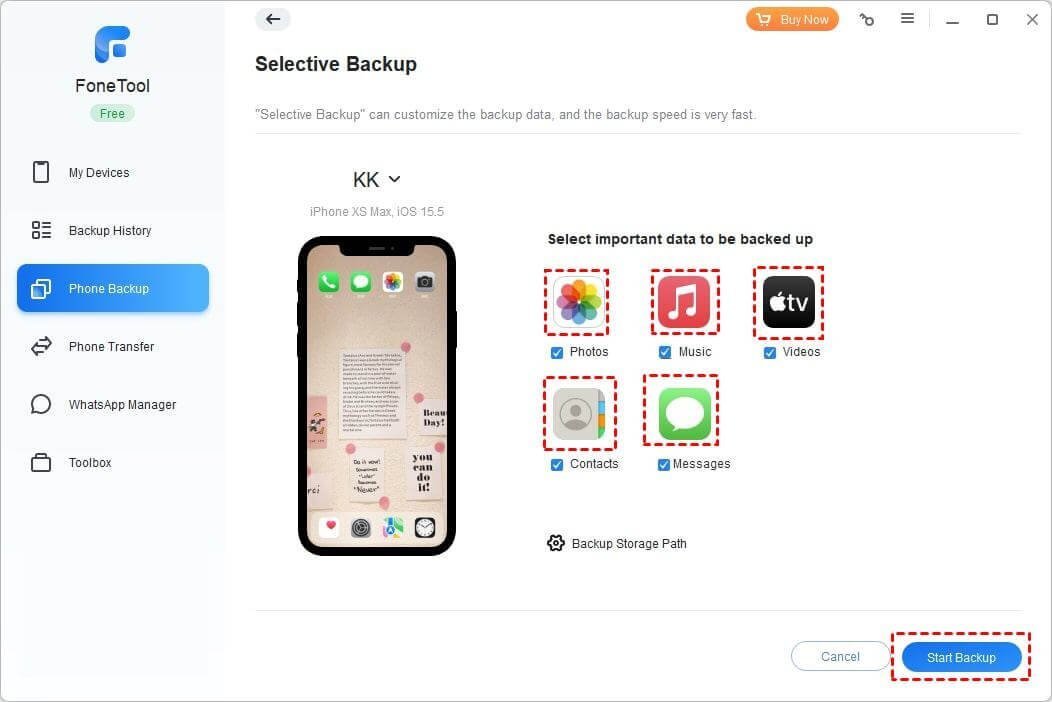
✔ Preview and Selective Backup: With FoneTool, you can preview the data before backing up and choose specific files or data types to backup.
✔ No Internet Required: FoneTool allows you to backup and restore your iPhone data without the need for an internet connection, avoiding “stuck on preparing iPhone for restore”.
Below is how to back up and restore your iPhone with FoneTool:
Step 1. Download FoneTool on your PC > Launch FoneTool and establish a connection between your iPhone and computer.
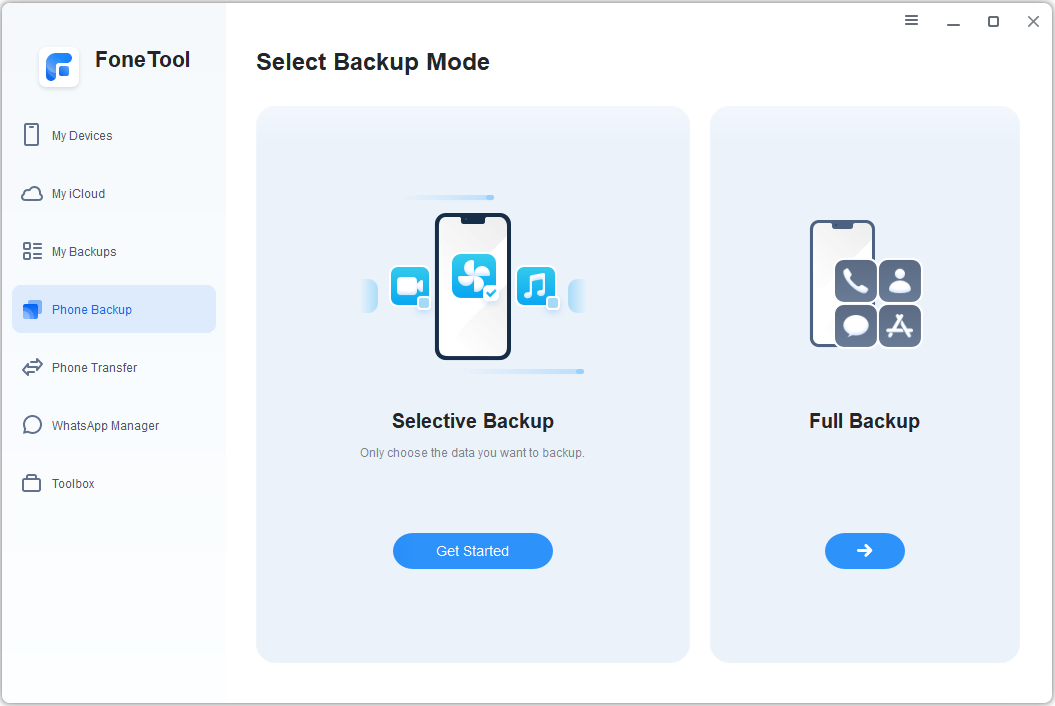
Step 2. Navigate to Phone Backup in the left panel and initiate a Selective Backup by clicking Get Started.
Step 3. Cherry-pick the files for backup and confirm your selection by clicking OK.

Step 4. Specify a destination path for your backup and kickstart the process by clicking Start Backup.
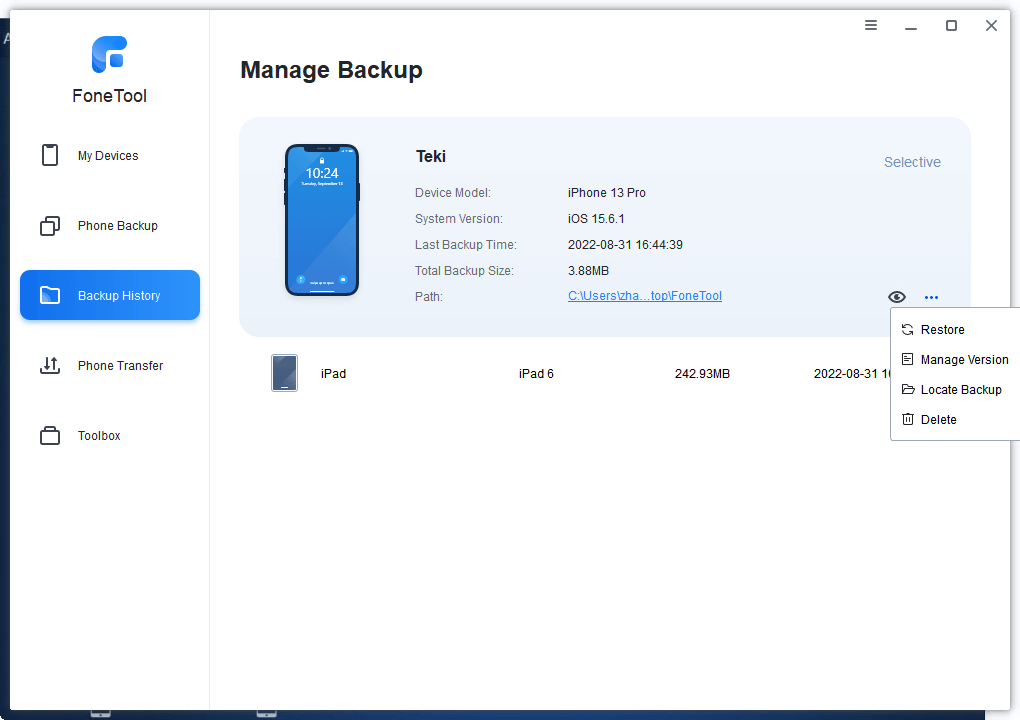
Once the backup is complete, you can access Backup History to select the desired files for restoration onto your iPhone when needed.
The Bottom Line
That's all about how to fix iTunes stuck on preparing iPhone for restore. This guide provides multiple solutions from basic troubleshooting to professional system repair with FoneTool Repair. For persistent iTunes restoration issues, FoneTool Repair offers comprehensive iOS system repair capabilities, while FoneTool provides reliable backup solutions as an iTunes alternative. Download FoneTool and use it right now!
Fixes 160+ iOS/iPadOS issues, boot loops, crashes, failed updates, with no data loss.
-
 iOS 26 Compatible
 iPhone 17 Supported
100% Secure

May is an editor who is passionate about sharing computer tips and providing reliable solutions, specializing in iOS/Android and file backup and recovery. In her spare time, May enjoys watching movies, going shopping, or chatting with friends.
Read author info >>