Want to know what iPhone 16e eSIM is and how it works? This guide explains how to activate an eSIM, transfer it to your new iPhone 16e, and troubleshoot any issues.

Recently, Apple released the latest iPhone 16e. As Apple continues to improve its technology, the iPhone 16e eSIM is expected to further revolutionize mobile connectivity. With eSIM (embedded SIM), you no longer need a physical SIM card, making it easier to switch carriers, manage multiple numbers, and improve security.

If you plan to transfer your eSIM to a new iPhone 16e or want to learn more about how iPhone eSIM transfer works, this guide will give you everything you need to know.
Also Read: iPhone 16 VS 16e: What's the Difference? Full Comparison!
iPhone 16e eSIM refers to the embedded SIM card (eSIM) technology in iPhone 16e models that allows users to activate a cellular plan without a physical SIM card. An eSIM is a tiny chip built directly into the device that can be programmed remotely by network providers.
Benefits of iPhone 16e eSIM
✅ No physical SIM card needed – No risk of losing or damaging a SIM card.
✅ Multi-carrier support – Store multiple eSIM cards and easily switch between them.
✅ Instant activation – No need to wait for a new SIM card from your carrier.
✅ More secure – eSIM cards cannot be physically removed, reducing the risk of SIM swap fraud.
✅ More space for hardware improvements – Removing the SIM card tray allows for bigger batteries and better internal components.
iPhone 16e users can activate their eSIM in a variety of ways, including scanning a QR code, transferring an existing eSIM from an old device, or using a carrier to activate. Here are the main ways to set up an eSIM on a new iPhone 16e.
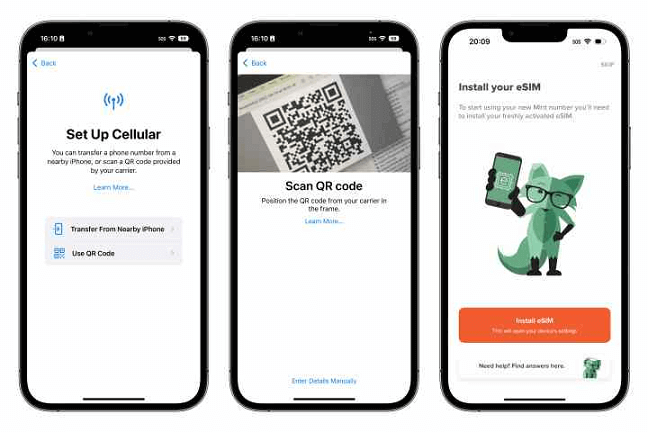
Some mobile carriers provide a QR code that allows you to activate your eSIM quickly.
Step 1. Go to Settings > Cellular > Add Cellular Plan.
Step 2. Use your iPhone’s camera to scan the QR code provided by your carrier.
Step 3. Follow the on-screen instructions to activate your eSIM.
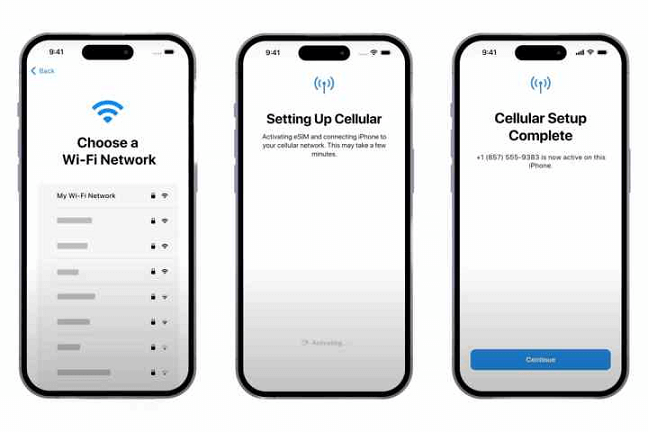
If you're upgrading from an older iPhone with an eSIM, you can transfer it directly without needing a QR code.
Step 1. Place your old iPhone near your new iPhone 16e.
Step 2. During setup, tap Transfer eSIM when prompted.
Step 3. Follow the on-screen instructions to complete the transfer.
If you want to learn more ways to transfer eSIM to new iPhone, you can tap the link and go to find answers.
Some carriers allow you to activate eSIM through their app or website.
Step 1. Open the carrier app or visit their website.
Step 2. Follow the activation steps and download the eSIM profile to your iPhone.
When upgrading to a new iPhone 16e, transferring data from your old device is essential. If you want a fast and hassle-free way to transfer data from your old iPhone to your new iPhone 16e, FoneTool is an ideal tool that simplifies the process.
FoneTool is a powerful iOS data transfer tool, it offers the simplest and most efficient way to complete the process with just a few clicks. Especially for iPhone 16e that does not support mmWave 5G, using FoneTool's USB transfer method can ensure fast and secure data transmission.
Now, you can free download FoneTool and follow the steps to transfer data from iPhone to iPhone.
Step 1. Connect your old iPhone and new iPhone 16e to the Windows PC via USB cables > If asked, tap Trust on your iPhone to continue.
Step 2. Open FoneTool > Go to Phone Transfer from the left panel > Choose iPhone to iPhone > Click Get Started.
Step 3. Confirm the source device and target device > Enable Backup encryption to protect your private data if needed > Tap Start Transfer to begin the iPhone data transfer.
With FoneTool, you can move your important data quickly and securely to your new iPhone 16e, ensuring a smooth transition without any data loss.
The iPhone 16e eSIM makes it easy to stay connected without a physical SIM card. Whether you're setting up a new eSIM, transferring from an old iPhone, or moving all your data, now the process is seamless. With tools like FoneTool, upgrading to a new iPhone 16e is stress-free, ensuring all your important information is transferred safely. Ready to make the switch? Follow the steps above and enjoy your new iPhone with ease!
