To get files stored on PC to your iPad, you can use guidance mentioned below to make it. To send a large number of files, FoneTool is suitable. To add a few files, choosing a wireless way might be more convenient.

When you need to view, edit or share files stored on PC from iPad, you may want to find some fast and reliable ways to transfer files or get some use tips on how to do it. This passage gives you 6 useful ways to make it, whether you want to use a wired or wireless way. And FoneTool mentioned in Method 1 might be your best helper.
What is the best way to transfer data to an iPad? For people who need to transfer a large number of files from PC to iPad, a professional iPad data transfer tool named FoneTool might be the answer! With its powerful features, you can share files between iPad and PC with simple clicks.
Free PC to iPad File Transfer Software

100% Secure
From the highlights mentioned above, you can know why FoneTool is a popular & professional iPad data transfer tool. Now you can download it to your computer and keep on reading to get how to move files from computer to iPad. With its wide compatibility, you can also transfer photos from PC to iPhone without iTunes.
Step 1. Connect your iPad to the computer via a USB cable > Unlock your iPad and click Trust if necessary.
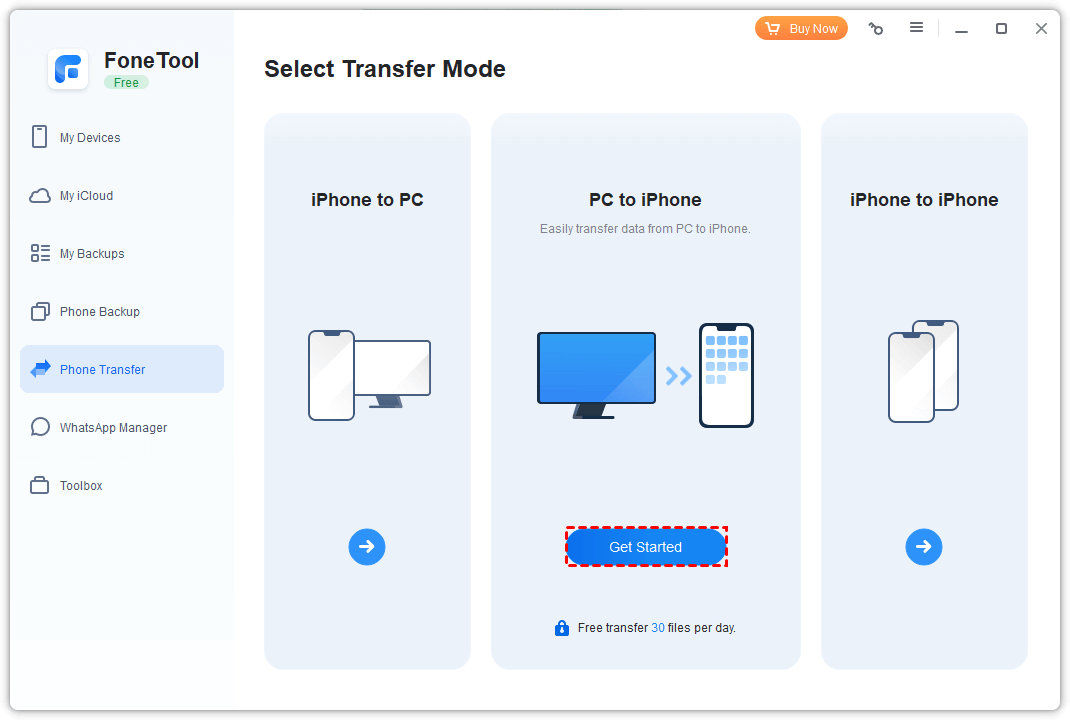
Step 2. Launch FoneTool > Go to Phone Transfer > Choose PC to iPhone and click Get Started.
Step 3. Choose the file icon you need > Click the box and choose your wanted files > Click Open to add them.
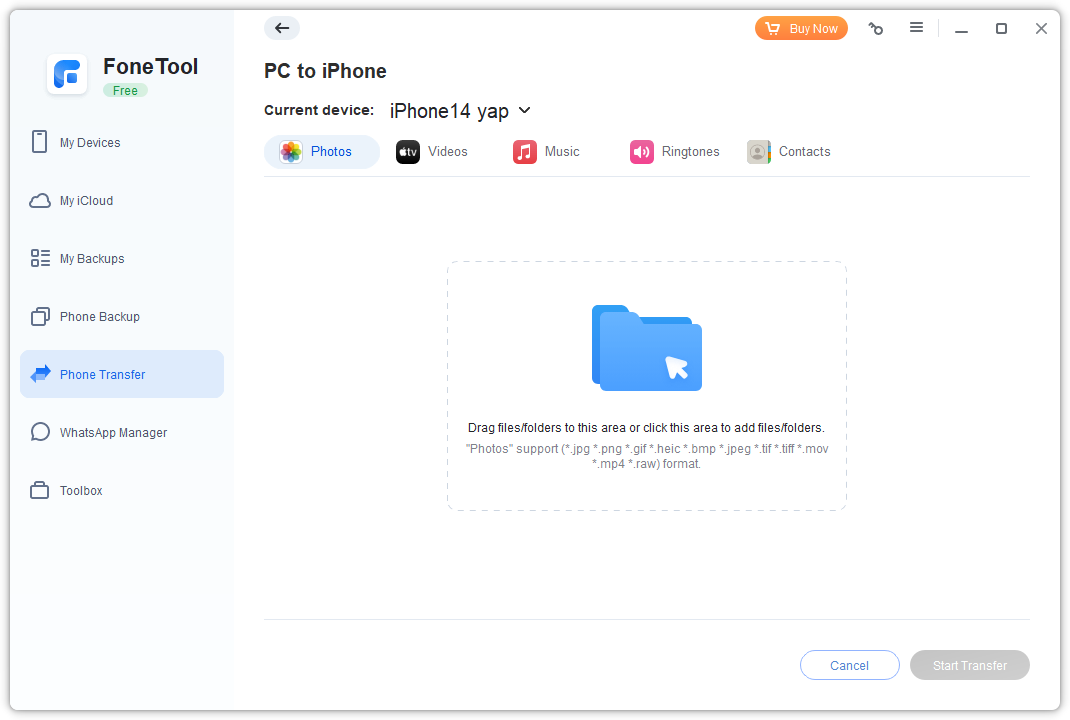
Step 4. Click Start Transfer to confirm your choice and begin the task.
How do I transfer files from PC to iPad without iTunes? Except for FoneTool, Windows File Explorer is another suitable way. You can use it to transfer photos/videos stored on your PC to the iPad DCIM folder and browse them from the Photos app after the transfer.
Step 1. Establish a connection with your iPad and Windows computer via a USB cable. If asked, click Trust.
Step 2. Open the File Explorer from your computer > Go to This PC and find your device named xxx iPad.
Step 3. Click the device and navigate to the Internal Storage folder > Choose DCIM > You can create a new subfolder to save files > Copy your needed files on PC and paste them to the targeted iPad folder.
As an official sync program for Windows PC, iTunes is also applied to connect PC to iPad and transfer files from PC to your targeted app on iPad.
Step 1. Connect your iPad to your computer > Open the latest iTunes on your PC.
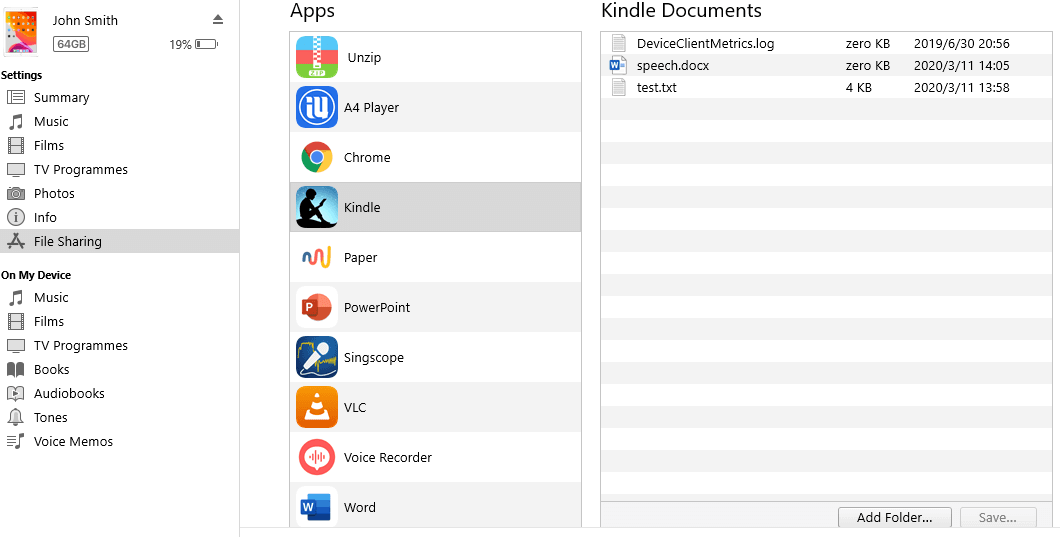
Step 2. Click the Device icon from the upper-left corner > Choose File Sharing > Select your targeted app to add a file you need. If you need to move a file that doesn't fit into any specific app, you can add it to the Files app folder > Click Add File to confirm.
Step 3. Then the File Explore will be opened > Now you can find the files you need > Click them and click Open to add to your iPad.
Step 4. Then the file's name will appear in the app's window in iTunes. Once all files are chosen, you can click Sync from the lower-right side of the iTunes window to start the transfer.
Once the sync process is finished, you can click Done to back to the main page. You can find the added files from your selected app on the iPad. Then you can open them on your iPad at any time.
If you need a wireless way to accomplish the task, iCloud is recommended. This way is suitable for users who only need to transfer a small number of files.
Step 1. Go to iCloud.com from your Windows PC, then choose to upload photos, videos, contacts, etc from your computer to the iCloud.
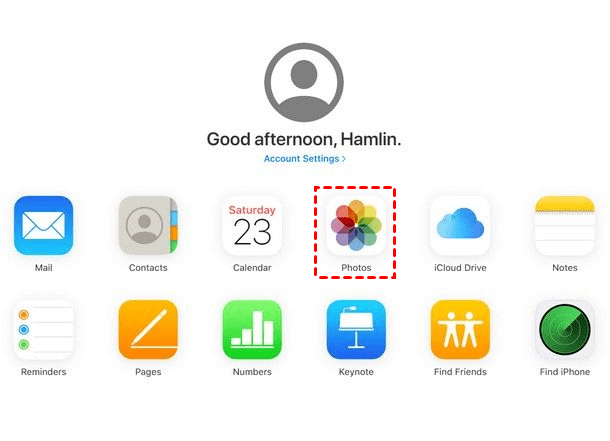
Step 2. Go to Settings from your iPad > Tap [your name] > Click iCloud and choose the app you need to sync > Enable the synchronization to download your uploaded files.
If you need a better way to speed up iCloud data upload process, a professional iCloud manager named FoneTool can help you a lot. You can even use it to upload notes from PC to iCloud, which iCloud.com cannot do.
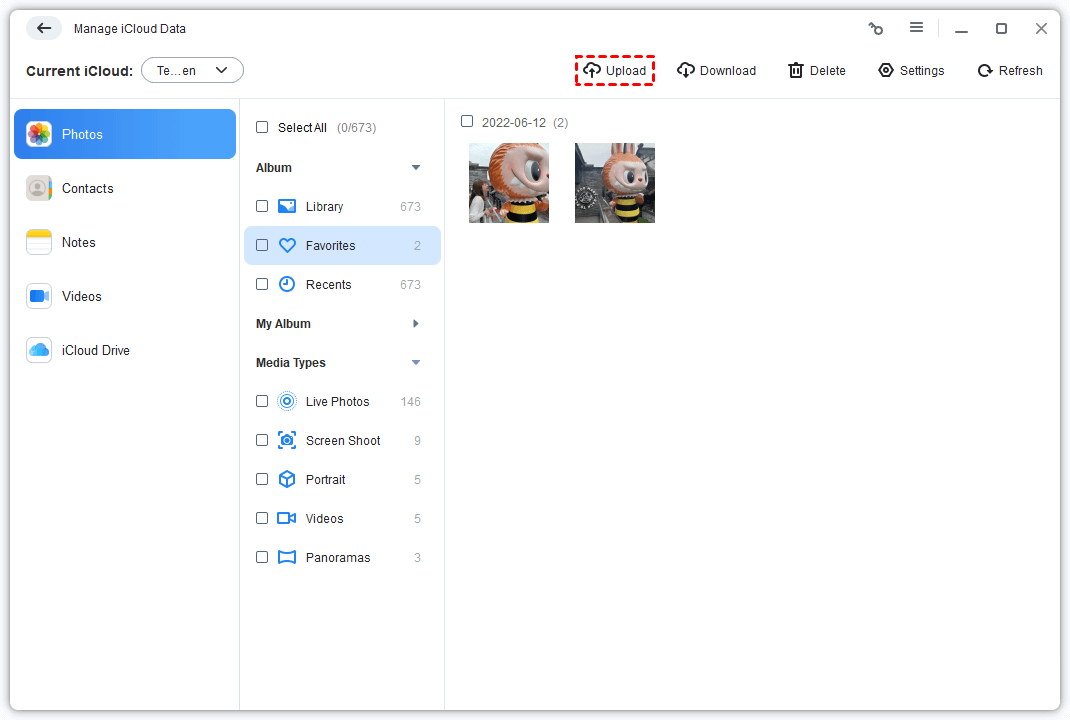
You can click the button to download and install FoneTool on your PC and go to My iCloud > Log in with your Apple ID > Choose Manage iCloud to upload the data you need.
Except for iCloud, Google Drive is also available. Compared to the 5GB of free storage offered by iCloud, Google Drive provides you with 15GB of space, allowing users to store more files wirelessly.
Step 1. Go to drive.google.com from your browser on computer. Click New from the top-left corner and choose File Upload or Folder Upload.
Step 2. Choose the specific item or folder you need from the pop-up window > Click Open or Upload to start the upload process.
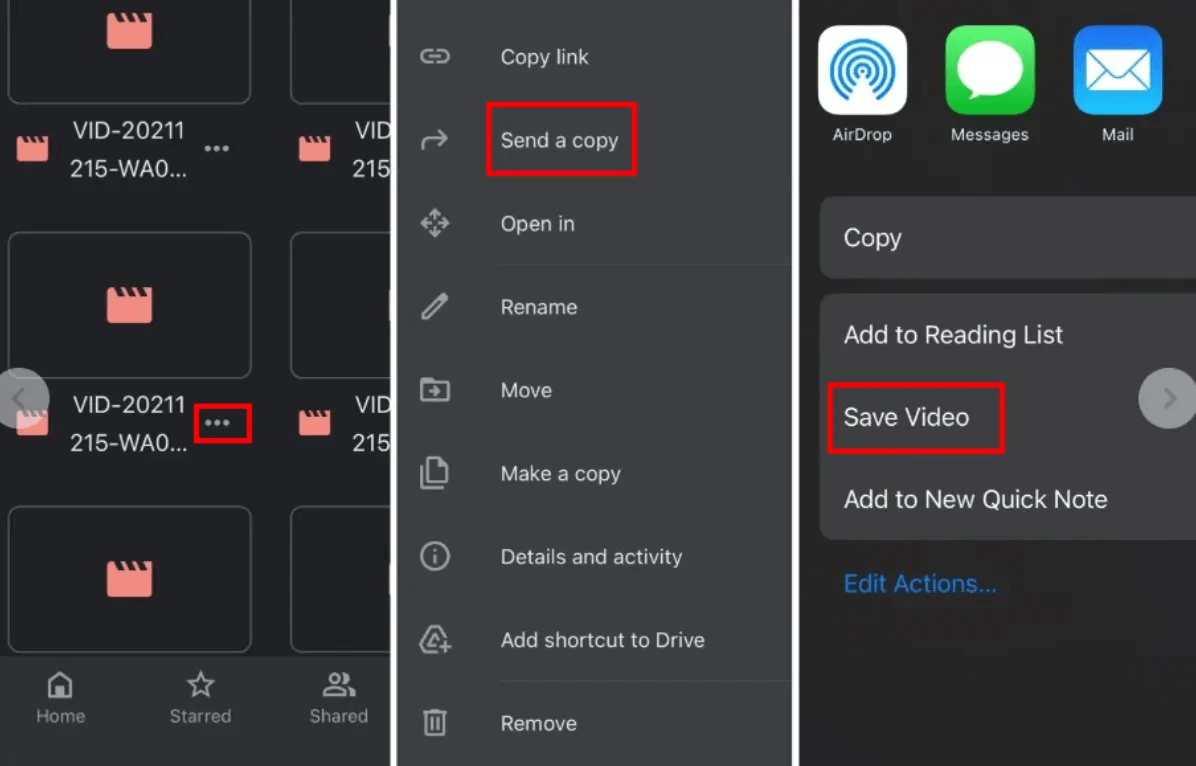
Step 3. Once all files are uploaded, now you can download the Google Drive app on your iPad and log in with your account > Find the targeted files > Click the three dots on the right side of the chosen data > Select Send a copy > Click on Save to download them to your iPad.
To transfer a few files from PC to iPad, you can also choose to send an Email.
Step 1. Create an email from your computer > Add the targeted files as an attachment > Send it to yourself.
Step 2. View the email on your iPad and save the attachments to your device to finish the transfer.
This passage tells you about how to transfer files from PC to iPad.
Hope you can find all the things you need in this detailed guide.