With the release of iOS 16.3, Advanced Protection makes iCloud backup encryption possible. You can learn how to encrypt iCloud backup in this guide.

The answer is Yes! Apple has introduced a significant security improvement in the latest version of iOS, 16.3. This update fulfills a long-standing request to add full encryption to iMessage in iCloud, iPhone backups, and eight other apps and categories. In short, iCloud backup encryption is now possible.

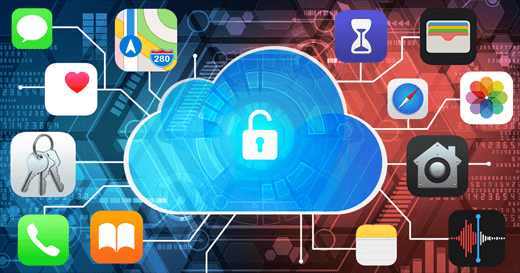
While end-to-end encryption was already available for Apple's Messages, iCloud Keychain, and Health data, the latest update extends this feature to include Messages Backup (Messages in iCloud), iPhone iCloud backup, iCloud Drive, Notes, Photos, Reminders, Safari Bookmarks, Siri Shortcuts, Voice Memos, and Wallet Passes. Just keep reading to learn more about how to encrypt iCloud backup.
Before we start explaining how to encrypt iCloud backup, let's take a look at this feature end-to-end encryption.
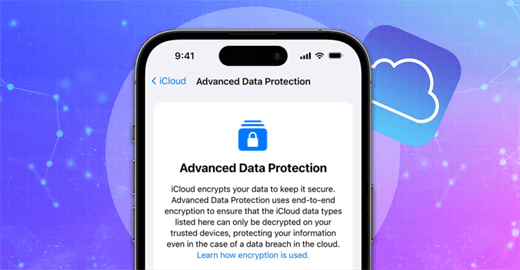
The Advanced Data Protection for iCloud can be enabled at the user's discretion. Apple utilizes encryption to convert your data into a complex code that can only be deciphered with a specific key. Apple made a significant change by ensuring that the key for backups is exclusively stored on your device, rather than in their data centers. By opting into this feature, the majority of your data uploaded to iCloud will only be accessible to you.

Furthermore, in the unfortunate event of an iCloud hack, Apple assures that most of your data would remain protected. Apple goes to great lengths to safeguard your information, to the extent that they are unable to access your data when it is stored on their servers.
Let’s start to see how to encrypt iCloud backup. Before you proceed, make sure your iPhone, iPad, Apple Watch, Mac, and HomePods are running on the latest software: iOS 16.3, iPadOS 16.3, macOS 13.2.
This step is crucial and will allow you to regain access to your data in case you forget your password. Here's how you can do it:
1. Begin by opening the Settings app on either your iPhone or iPad. If you're using a Mac, head over to System Settings.
2. Locate and tap your Apple ID banner, which is positioned at the top of the menu.
3. Look for the iCloud option and select it.
4. From there, navigate to the Advanced Data Protection section.
5. Choose the Account Recovery option and carefully follow the onscreen instructions to complete the setup process.
Have set up Account Recovery already? Learn how to encrypt iCloud backup.
1. Access the Settings app on your iPhone or iPad. On a Mac, go to System Settings.
2. Tap your Apple ID banner.
3. Choose "iCloud" from the options.
4. Locate and select "Advanced Data Protection".
5. Tap Turn on Advanced Data Protection to enable iCloud backup encryption feature.
Congratulations! Your iCloud backups have been successfully protected with an advanced end-to-end encryption system! This security measure ensures that your data is protected from any unauthorized access or tampering.
Furthermore, you have the flexibility to disable the Advanced Data Protection whenever you please. In such a case, your device will take the necessary steps to securely upload the encryption keys to Apple servers. As a result, your account will transition back to a standard level of protection while still maintaining the integrity of your valuable information.
You can encrypt iCloud backup to obtain the highest level of cloud data security However, what if you lose access to your account? In this case, how to get all the important files? In addition, there are other things to consider when using iCloud backup.
To successfully back up your iPhone to iCloud, it is essential to ensure that you have sufficient iCloud storage space to store all your data and settings. Additionally, a stable network connection on your device is necessary.
In the event that you do not have enough iCloud storage available, you may encounter the error message. In such cases, purchasing additional storage is advisable. It is important to note that even if you have successfully backed up your iPhone to iCloud, you can only access the backup when you are restoring a device from iCloud.
If you're looking for an alternative to iTunes or iCloud, I recommend using FoneTool, an iPhone data management tool. This efficient tool allows you to conveniently back up your iPhone's photos, videos, contacts, messages, music, and more.
⭐ Whether you want to back up everything or just select certain files, FoneTool has got you covered. ⭐ Additionally, you can easily preview each item and choose exactly what you want to back up. Once you've created the backups, you can effortlessly access and locate your data on your computer. ⭐ Another fantastic feature is the ability to restore backup files to your iPhone without deleting any existing data. With FoneTool, you're in control of your iPhone backups and can conveniently manage your data.
FoneTool offers a great alternative to iCloud/iTunes and provides additional features for custom iPhone backups. You can click the download button to install FoneTool on your device and follow the steps below to backup your iPhone.
1. Open FoneTool on your computer and connect your iPhone using a USB cable.
2. On the home interface of FoneTool, navigate to the left pane and select "Phone Backup" > Then, go to Selective Backup and Full Backup. Here, we choose Full Backup.
3. If desired, you can enable backup encryption to protect your private data like Fitness records, Health, and Keychain.
4. Next, select a location to store the backup, whether it be a local folder, external hard drive, or USB flash drive.
5. Once you've made your selection, click "Start Backup".
When the backup is completed, you can go to Backup History to check the backup.
? With Selective Backup, you will have the choice to preview and select the files you want to backup.
That’s all about how to encrypt iCloud backup. The advanced Data Protection serves as a comprehensive safeguard for iCloud, putting your backups under your management through best-in-class end-to-end encryption. However, it is important to note that you assume the responsibility of retrieving your data in case your device goes missing or gets lost.